Now that we have learned how to create accounts, build a resource hierarchy, and set up roles, we will look into IAM policies that connect all of those items to allow users to access resources in a fine-grained way within a hierarchy.
In IAM, Cloud Identity users, Cloud Identity groups, service accounts, and, for some services, a Cloud Identity organization or all (authenticated) users are called principals. Principals are granted roles on resources via IAM policy binding.
Note that a recommended practice for IAM policies is not to grant roles to individual users but to groups. Groups help manage users at scale because each member inherits roles assigned at the group level.
The following figure presents how IAM access to resources is set up. It is the result of assigning a principal (such as a group or a user) an IAM role (a set of permissions) on a resource (such as a project, folder, or – in some cases – a particular service). Note that the higher a resource in a hierarchy, the broader the access scope. For example, all projects under a folder will inherit permissions assigned at the folder level.
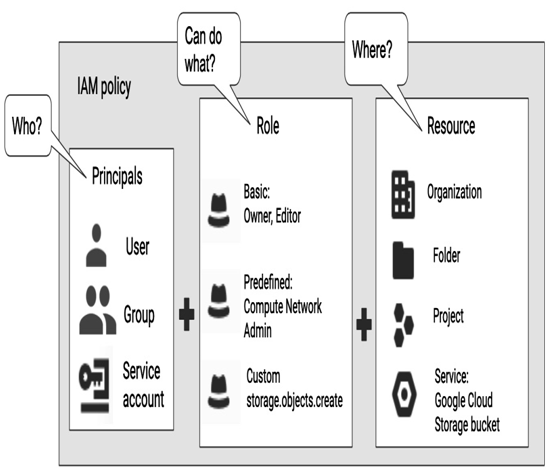
Figure 12.20 – An IAM policy consists of a principal, a role, and a resource
Now, let’s take a look at how IAM access can be assigned to resources in the Google Cloud console:
- To grant access to resources, select GRANT ACCESS in the IAM section in IAM and admin. In the IAM section, you can also find a list of existing permissions at the project level or, if a folder or organization was selected, at higher levels in a hierarchy:
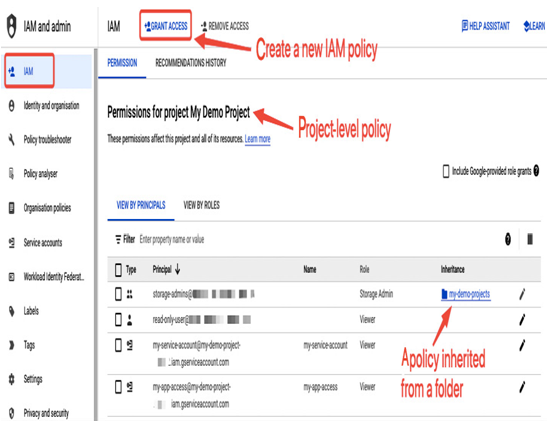
Figure 12.21 – Granting access to resources in IAM in the Google Cloud console
- In the next step, you provide a principal and a role. A principal can have multiple roles assigned. The following screenshot presents the GRANT ACCESS view for different scenarios. On the left-hand side, an organization is a resource on which a basic role, Viewer, is assigned to a single user. On the right-hand side, a folder is a resource on which a predefined role, Storage Admin, is assigned to a group of users:
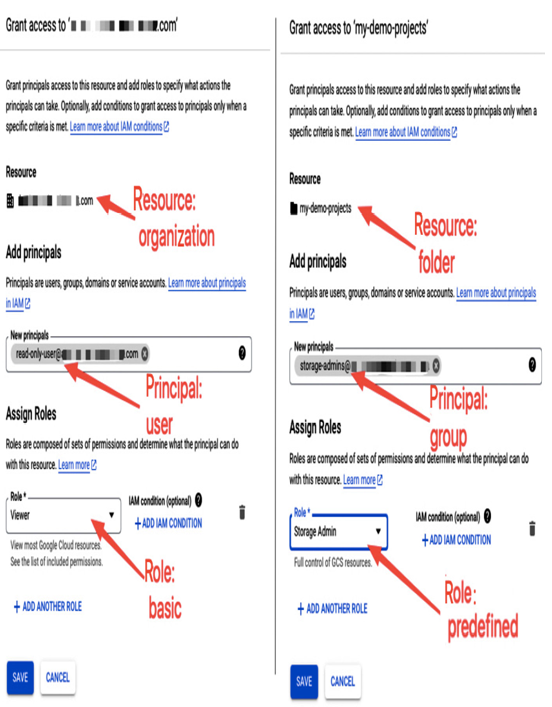
Figure 12.22 – Comparing different IAM policies at an organization and a folder level
The following is another example where two roles are assigned to a single user at the project level. To add more roles, as in this case, select ADD ANOTHER ROLE in the GRANT ACCESS view of the IAM section:
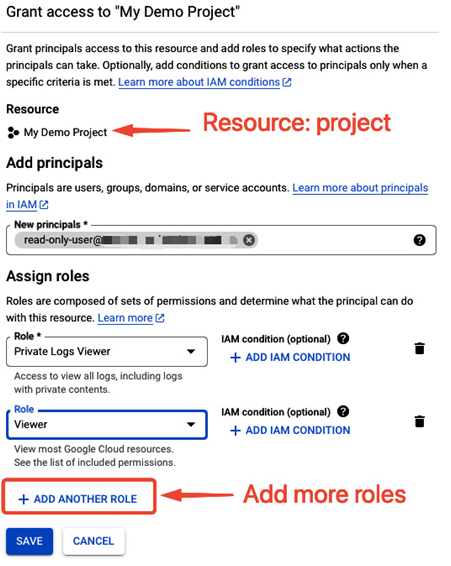
Figure 12.23 – Adding multiple roles to a principal
Note that in the IAM section, you can view permissions for each principal and modify them as presented in the following screenshot:
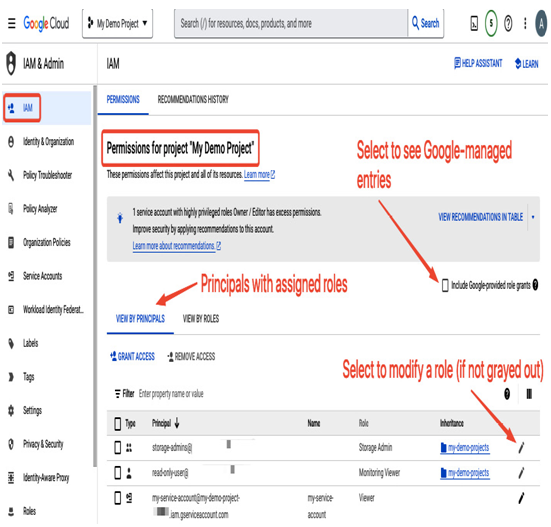
Figure 12.24 – Viewing and editing IAM permissions
When permissions are assigned higher in a hierarchy, such as at the folder level, you can’t modify them at a lower (project) level. In such cases, the edit option is grayed out.
