Deploying changes with other tools
If we need more control over the deployment process, we can use other tools that are provided by the Salesforce platform.
The first one, which is also at the core of the other methods, is the use of Metadata APIs. This is a set of APIs that are used to retrieve, deploy, create, or delete metadata items.
This powerful yet simple set of methods communicate with any Salesforce organization, retrieve all kinds of metadata items, create and update a variety of configurations, and finally deploy those components in a target organization.
Like the other tools that we are going to mention, Metadata APIs don’t need source and destination organizations in order to refer to the same production instance. This means you can deploy from a developer edition organization to a Full sandbox, from a developer sandbox to a sandbox, the children of different production organizations, and so on. Metadata APIs are metadata-centric, which means they don’t need to know who is the original owner of a given item.
For a complete list of all the supported metadata types, please refer to https://developer.salesforce.com/docs/atlas.en-us.api_meta.meta/api_meta/meta_types_list.htm.
As an administrator, you typically never get your hands dirty with Metadata APIs; instead, you’ll use tools based on these APIs (these tools take care of the communication part of the deployment).
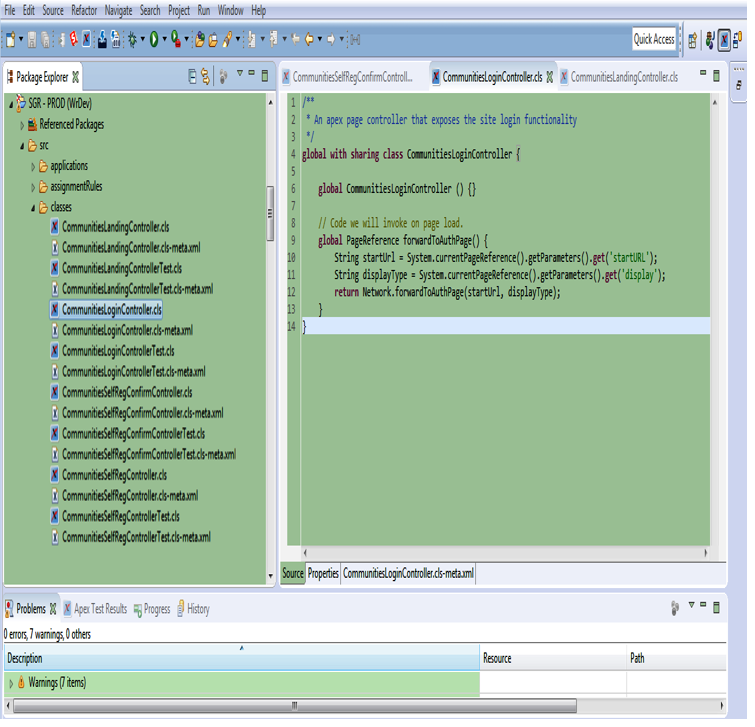
Even though it was discontinued on October 12, 2019, I want to mention an old companion of my days as a junior developer—the Force.com IDE (https://developer.salesforce.com/docs/atlas.en-us.eclipse.meta/eclipse/ide_getting_started.htm). Even though its support has ended, if anyone has an installed version of it, the IDE can still be used (thanks to the fact that Salesforce keeps supporting old API versions for at least three years after their introduction).
This tool is based on Metadata APIs and on the Eclipse framework (a powerful and free IDE for Java developers). This tool was meant to help developers code their Apex code and Visualforce pages (and Lightning Aura Components ultimately).
To get the Force.com IDE working, all you had to do was the following:
- Create a new project.
- Set up the source organization’s username, password, security token, and type of instance (for example, production, sandbox, developer organization, pre-release organization, or custom login URL).
- Select the required metadata components (a developer would typically select classes, triggers, pages, components, and static resources).
- Wait until the items were retrieved.
- The developer did their work by changing classes or pages and deploying them to the source organization (it was as easy as hitting Ctrl + S on your keyboard).
- Once the change was ready to be released, you selected all the components you wanted to deploy, right-clicked, and selected the Deploy menu item.
- Insert the username, password, security token, and type of instance of the destination organization (that is, a production, developer edition, or sandbox instance)
- Click on the Deploy button to start the deployment.
From the Setup | Environments | Deploy | Deployment Status menu, you could watch the deployment work and gather information in the case of a failure.
One of the things that I loved the most was the possibility to create different projects altogether (let’s say, one for the Dev sandbox and one for the Test sandbox) and compute differences of the same file on the fly from the two organizations in order to understand what changes have been applied in both instances (when more developers work on the same Apex class, checking for changes can be a mess).
Another thing I loved was the possibility to check the whole project for a given metadata item. Let’s say you wanted to know the impact of removing a given custom field. The main question would be, “Enrico, can you tell me where this field is being used?” By creating a Force.com project with all the available metadata, you could simply search for a string to get all the matches:

Force.com IDE workspace
Another glorious tool is the Ant Force.com Migration Tool. Based on Metadata APIs as well, it is a command-line tool that is meant for automated deploy operations, and due to its nature, it can be used for Continuous Integration, Continuous Deployment, or Continuous Delivery.
But what does this mean? It’s a way of saying, “Hey, when I change something and I approve it, it should be immediately deployed to the destination source.” To do this, developers would generally use a code versioning tool (that is, a tool such as Git or SVN that can keep track of all the changes that have been made to an organization’s metadata) and once they had pushed a change to the version control system, an automated script would run and tell the Ant Force.com Migration Tool to activate a deployment.
If you want to find out more about the Ant Force.com Migration Tool, please refer to https://resources.docs.salesforce.com/sfdc/pdf/salesforce_migration_guide.pdf.
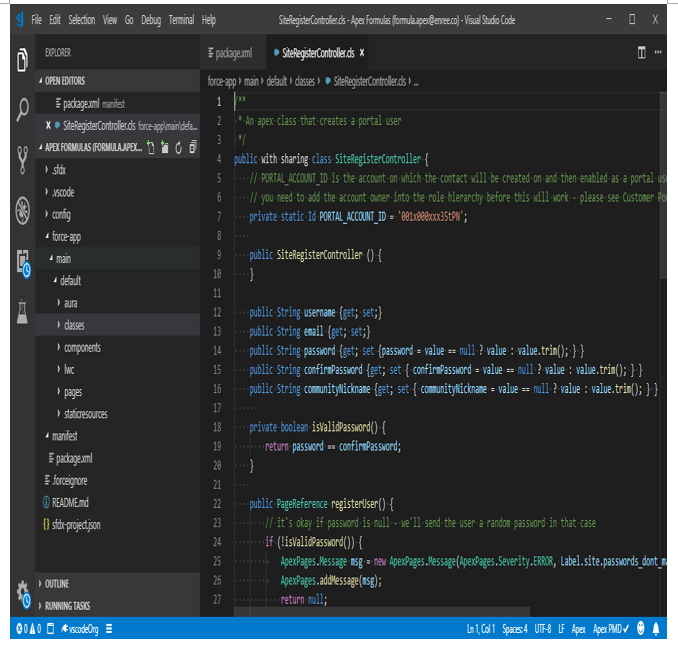
Another official tool that was created recently (and officially replaces the Force.com IDE) is the Salesforce Extension Pack for Microsoft Visual Studio Code (https://forcedotcom.github.io/salesforcedx-vscode/). With this, can do all the stuff you could do with the Force.com IDE (and more), but it also supports the new Lightning Web Components framework.
The whole tool was originally meant for Salesforce DX development (have a look at the Trailhead trail at https://trailhead.salesforce.com/en/content/learn/trails/sfdx_get_started for more information) but it was recently updated to support project development (a classic way to develop on Salesforce). The following screenshot shows what Visual Studio Code looks like:

Visual Studio Code workspace
Some other famous but not free Salesforce IDEs are as follows:
- The Welkin Suite (https://welkinsuite.com/)
- Illuminated Cloud for the IntelliJ IDE (http://www.illuminatedcloud.com/)
