This step selects the user who will be accepting the approval request, and can be set to the following:
- Let the submitter choose the approver manually: The user is selected manually by the submitter.
- Automatically assign using the user field selected earlier: (Manager): The user referenced through the hierarchical relationship based on the approving record’s owner user (which is our choice for the current step: the Manager field). This option is only available if the approval process has been configured to support this behavior (as seen earlier).
- Automatically assign to queue: The users from a specific queue, only if the approval object supports a queue (such as the case object (bear in mind, however, that this option is not shown in the previous screenshot as the opportunity object doesn’t support queues)).
- Automatically assign to approver(s): The statically selected users (this will be our choice for the next step, where the CEO will be required to approve deals over $1M). This configuration can contain up to 25 users.
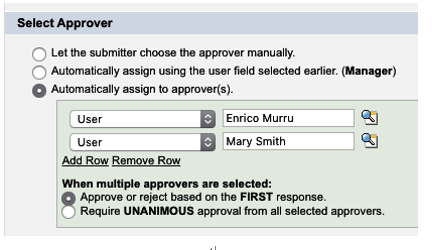
When you select Automatically assign to approver(s), the form will show newly available configurations:

Select approvers on the approval step wizard
By selecting more than one approver, you can even decide whether the decision should be unanimous or whether the first approval/rejection considered will be the final response.
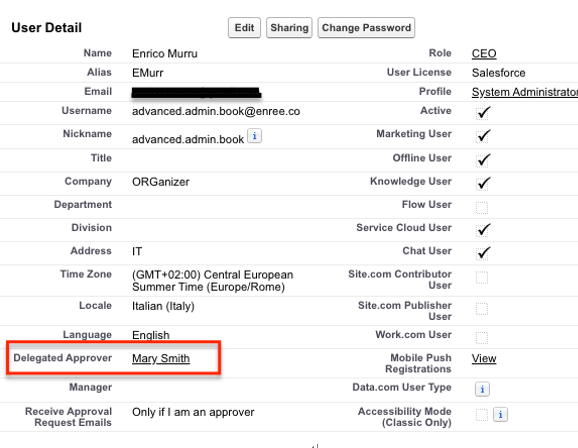
Another option is The approver’s delegate may also approve this request checkbox, which is used to allow approvers to delegate an approval to their delegated user. In our scenario, the CEO may not be available to inspect the deal and provide an approval, so they can delegate their Delegated Approver, a standard user lookup found on the user layout, which is not a hierarchical relationship field:

Delegated approver field on the user object
In our scenario, we’ll have the following users:
- Laura Gnite, sales rep
- Mary Smith, sales SVP and manager of Laura Gnite
- Enrico Murru, CEO and manager of Mary Smith
Click Save to complete the step:

First step configured
- Hit the New Approval Step button once again (as we did in step 1) to create our last step. Here are the configurations needed to complete our approval:
- Name: Big deals
- Step Number: 2
- Step Criteria: Opportunity: Amount greater than or equal to 1,000,000
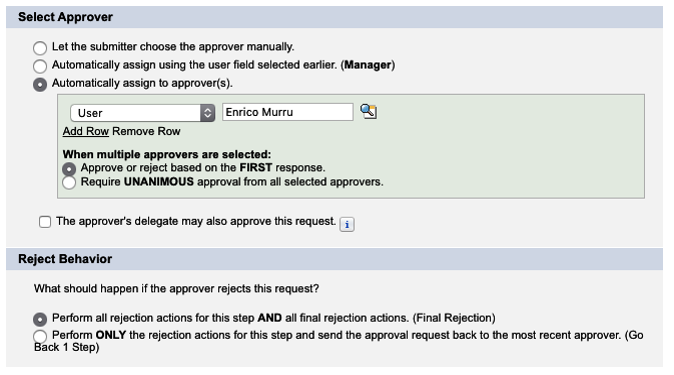
- Reject Behavior: Perform all rejection actions for this step and all final rejection actions. (Final Rejection)
The last configuration is only visible from any step that has a previous step (so it won’t be visible from the first one):

Reject behavior selection on Step 4 of approval step configuration
We haven’t seen actions yet, but from this rejection configuration, it is possible to either consider the rejection as final (and so all final rejection actions should be executed) or as just a step rejection, which means that only the current step’s rejection actions should be executed and the approval will go back to the previous step for further modification (for example).
5. Now click the Save button for the last time and get back to the process details page:

Approval steps related list on the approval process details page
We will now close the configuration, but we still need something to complete the approval, namely, the actions to be performed to allow the process to be completed.
