Custom notifications
Custom notifications are a great introduction to the summer 2019 release of Salesforce. Here, you can define custom notifications that can be sent to users via mobile or desktop.
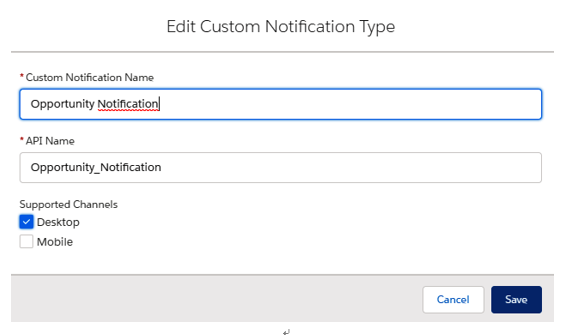
To define a custom notification, go to Setup | Notification Builder | Notification Types and click the New button, as shown in the following screenshot:

Custom notification type creation
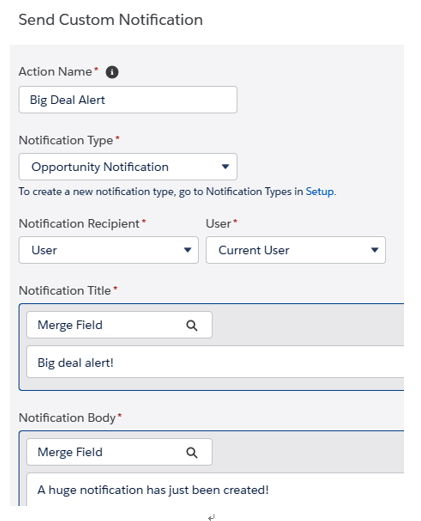
From here, you can customize a new action on the Process Builder in order to send custom notifications, as shown in the following screenshot:

Custom notification action
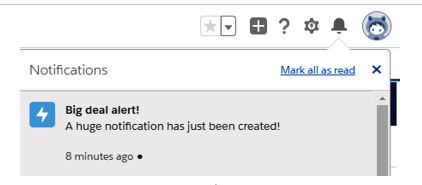
When the action is executed, a new notification appears for the selected user or group of users:

Custom notification on the user side
If you click on the notification, you will be redirected to the opportunity.
Apex
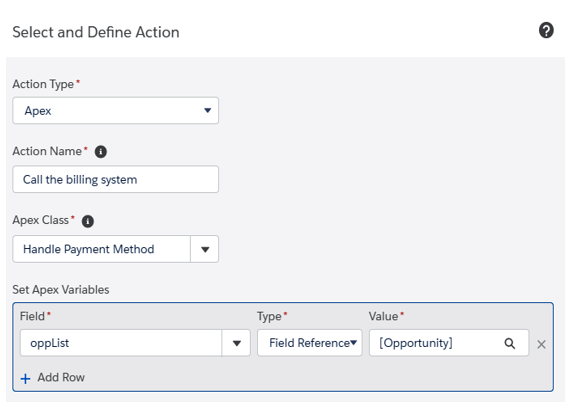
If the previous actions are not enough to define your process, you can use an Apex class to execute custom code and implement the necessary algorithm:

Apex action definition
In this example, we are calling a custom Apex class to communicate with the external billing system in order to set up a payment method (this operation can’t be done without using custom Apex integration).
The Apex class must contain the @InvocableMethod annotation and must be shaped in a specific way so that it can be called by the Process Builder. Tell your developers to refer to Salesforce Help at https://developer.salesforce.com/docs/atlas.en-us.apexcode.meta/apexcode/apex_classes_annotation_InvocableMethod.htm for more information.
Managing the Process Builder
A process can be set with two different statuses:
- Inactive
- Active, that is, the process cannot be changed, only cloned
When cloning a process, you can clone the current process as a new version (so that it can be activated when your job is done) or as a brand-new Process Builder (this is particularly useful when you’re using templates).
We can have up to 50 versions of a given process but only one can be active at a time.
To activate a process (by using the Activate button on the builder), we need to have at least one criteria node and one immediate or scheduled action group; once activated, all the other versions will become inactive.
To monitor pending scheduled actions, click on Setup | Process Automation | Flows and refer to the Paused and Waiting Interviews page. In fact, when a process schedules an action, Salesforce creates a flow interview record and pauses it until the scheduled time occurs. This is why we have to go to the Flows page to get the list of awaiting actions.
To troubleshoot errors on the Builder, we can use the Apex Debug Logs (which we looked at the beginning of this book); they work more or less like they did when we looked at the workflow rule example.
For more details about debugging a Process Builder, please refer to Salesforce Help at https://help.salesforce.com/articleView?id=process_troubleshoot_debuglogs.htm&type=5.
