Create a new screen element called account details with the following components:
- Text component:
- Name: Account name
- API name: account_name
- Required: True
- Default value: {!account.Name}
- Text component:
- Name: Duns Number
- API name: account_duns
- Required: True
- Default value: {!account.DunsNumber}
- Currency component:
- Name: Annual Revenue
- API name: annual_revenue
- Required: False
- Default value: {!account.AnnualRevenue}
- Decimal places: 2
The following screenshot shows the screen element’s account details:
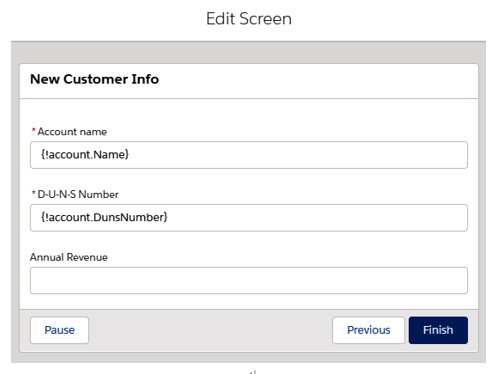
Account details for the screen element
Have you noticed that none of the components have the Set Output Values attribute section? This is because these are simple components that do not convey complex logic.
Does this mean that we cannot set text or currency components for variables like we’ve done for the contact details screen?
The answer is that we can; however, we need to use the assignment element again to map the form components to the proper variable fields. Let’s look at how we can do this:
Create a new resource variable of the Account type by going to Toolbox | Manager | New Resource:
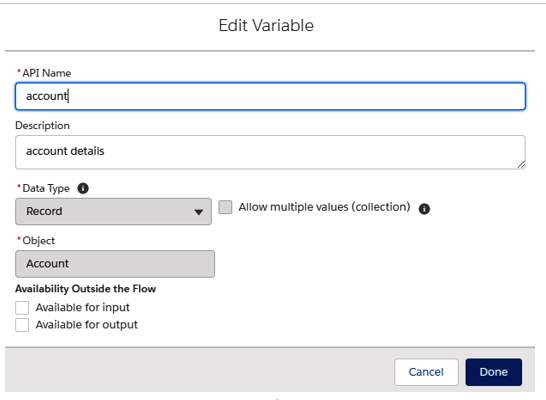
New account resource definition
Next, create a new Assignment element so that you can store the screen components, values in the account resource:
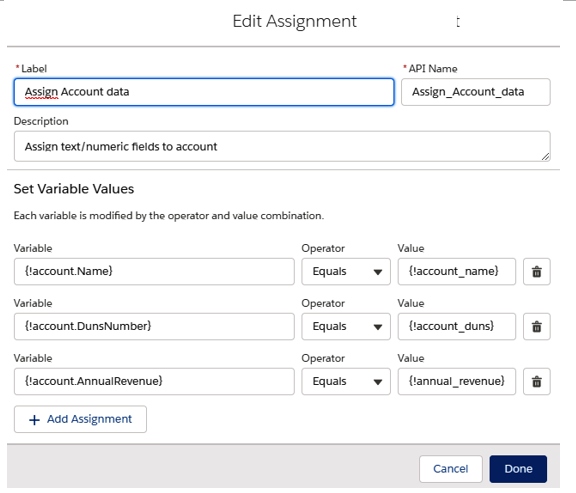
Components being assigned to variables
Remember to update the Contact Defaults element in order to initialize the account fields as well:
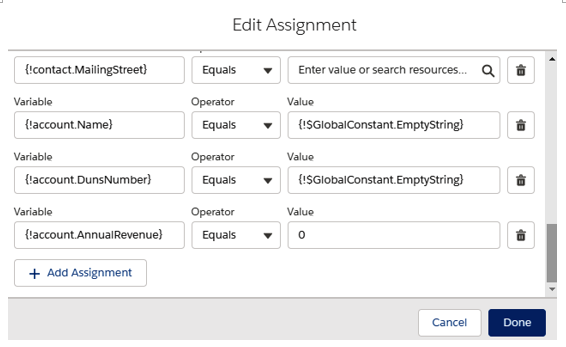
Contact Defaults element screen with new defaulted values for the account resource
Now, let’s modify the customer info verification screen so that it displays the account data:
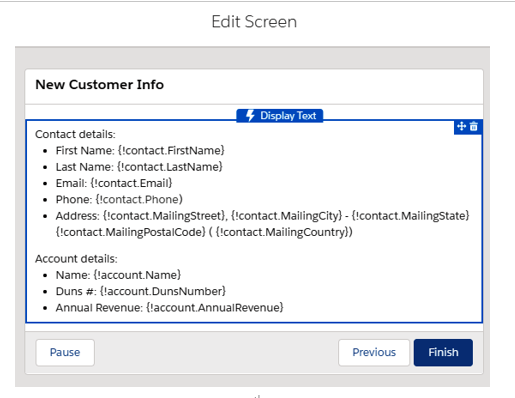
Data verification screen
Finally, detach the Customer info review and link everything together, as follows:
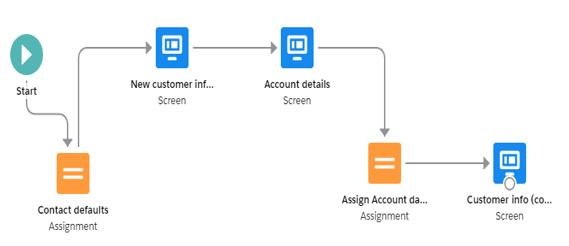
New flow configuration with account data
The whole flow can now be summarized in the following steps:
- Initialize the contact and account data
- Get contact details
- Get account details
- Finalize variable assignment
- Review the data
For the last few steps, we’ll be creating some logic to handle contact/account creation.
First, we need to know whether the contact and account are already in our database.
We’ll be using the Email field on the contact and the Duns Number on the account. Initially, they were unique fields.
For this, we need a Get Records element that can query a given object type based on specific conditions.
We’ll be creating a Find Contact by email element with the following configuration (this is shown in the following screenshot):
- Label: Find Contact by email
- Get Records of This Object:
- Object: Contact (name of the object that the element will query)
- Filter Contact Records:
- Condition Requirements: Conditions are Met
- Field: Email
- Operator: Equals
- Value: {!contact.Email}
- Set Contact Records:
- Sort Order: Not sorted (we don’t need sorting)
- How Many Records to Store: Only the first record (this is based on the fact that we consider the email field to be unique across all the contacts)
- Where to Store Field Values: In separate variables (we want to get the contact ID field only; the rest of the contact data will be received from our flow)
- When no records are returned, set specified variables to null: Set this to true so that if no contact is found, no value is set on the variables we’ll define in the next section
- Select Variables to Store Contact Fields:
- Field: ID field of the contact object
- Variable: {!FoundContactID} (this text variable has been created inline and will contain the matched contact, if there is one)
