A typical operation when working with instances is resizing a disk. We do it mainly when the disk is full and needs more capacity.
Console
To increase the disk size, we need to go to the storage section of the Cloud console and click Disks. Choose the desired disk you want to increase by clicking its name and then clicking on the three dots. Choose EDIT to increase the disk size:
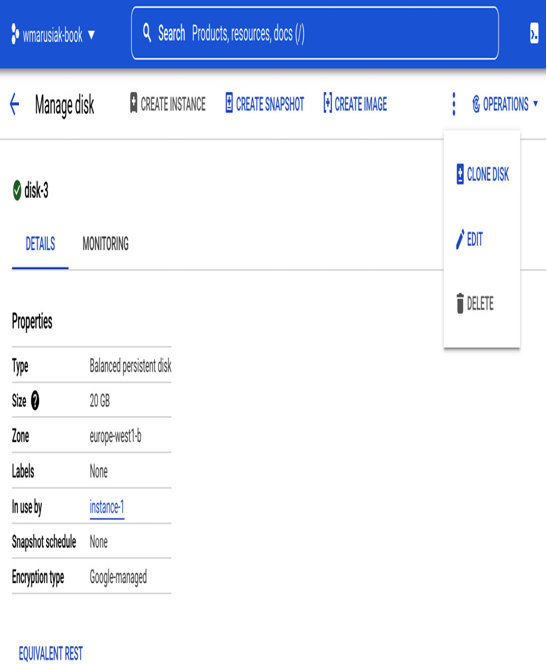
Figure 4.45 – Detailed information about the existing disk attached to the VM
Enter a new disk size and click SAVE:
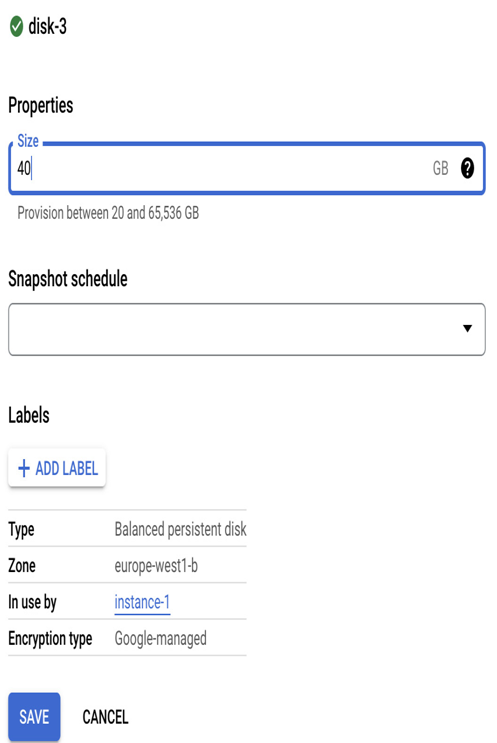
Figure 4.46 – Change of disk size in cloud console
After a moment, the disk size will be increased to the desired size. Remember that increasing the disk size in the Cloud console doesn’t update the filesystem in the instance itself. You must extend the filesystem itself to use increase the capacity.
Command line
To increase the disk size, we need to get its name first. Utilize the command from the task, Deleting a disk from a VM .
Once you have the disk name, use the following command to resize it:
gcloud compute disks resize DISK_NAME –zone=ZONE_NAME –size=XXXGB
One thing to remember is the disk size limit for instances. The size limit for a single disk is 65,536 GB, and the maximum capacity for a local SSD is 375 GB. The maximum storage capacity per instance is 257 TB and 9 TB for local SSDs.
Creating an instance snapshot
An instance snapshot allows us to capture the state of a disk at a snapshot creation point in time. Snapshots can be used to go back in time to when a snapshot was created. Snapshots are the easiest feature to utilize if you want to revert to a different state quickly.
Snapshots use cases are as follows:
- Quickly reverting to the previous state of the disk
- Operating system patching
- Application patching
- Operating system changes
One important thing to remember is that snapshots aren’t a backup. Although they provide similar functionality, snapshots aren’t backups for the following reasons:
- Backups should be independent of the source VM
- Snapshots don’t provide a capability for granular restore options such as file restoration
Let’s create our first snapshot of the disk.
Console
In the Cloud console, navigate to Snapshots and click Create a snapshot.
We need to provide a name for the snapshot, (optionally) add a snapshot description, and choose a source disk:
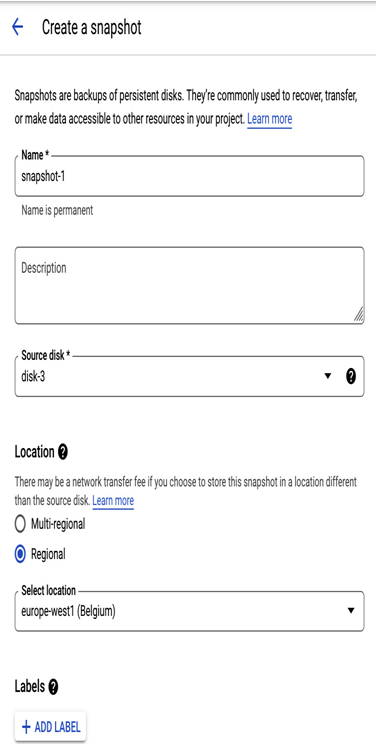
Figure 4.47 – The initial snapshot configuration section
We can use multi-regional or regional snapshot locations, add labels, choose encryption, and use application-consistent snapshots:
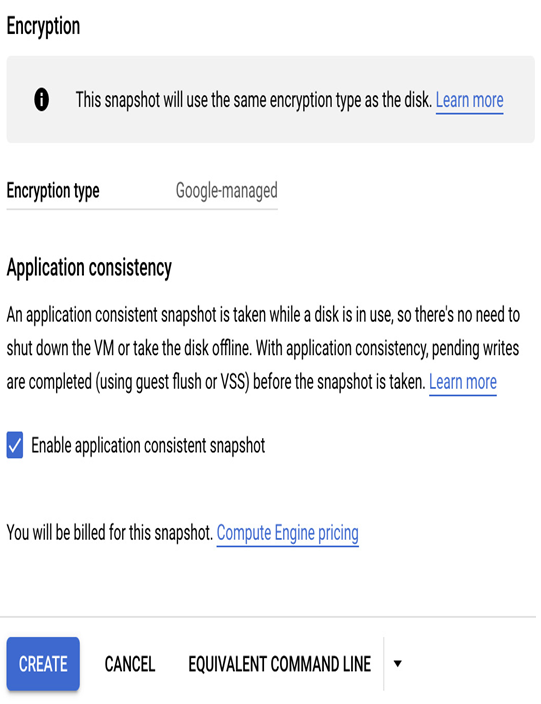
Figure 4.48 – Section two of the snapshot creation
An application-consistent snapshot allows us to preserve application consistency and uses operating system features such as the Volume Shadow Copy (VSS) Service in Windows.
If you want a 100% consistent snapshot without any application or data corruption, we highly suggest powering off the instance before taking a snapshot.
In the last step, click CREATE to initiate snapshot creation. Remember that when creating a snapshot, we do so for just one selected disk:
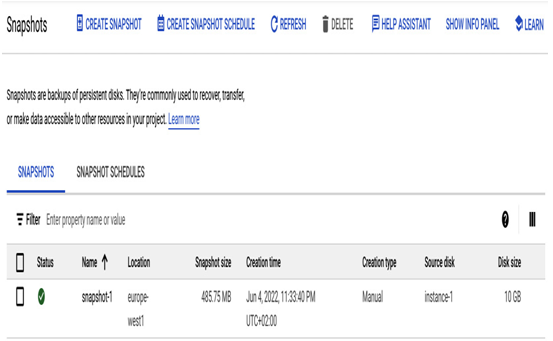
Figure 4.49 – Newly created snapshot visible on the Snapshots page
After a moment, the snapshot of the disk is created and can be used. Snapshot creation can take from several seconds up to a few minutes. It depends on the size of the application, how large the disk is, and how busy the application is.
