Let’s create an MIG. To do so, we need the following items:
- An instance template: We created one in this chapter. Create a new one or reuse a previously created one. We also need an application that is configured.
- A firewall rule to allow access to the application.
In the Cloud console, navigate to Compute Engine and the Instance groups section:
- Click Create Instance Group.
- We need to provide details about our MIG:
• Name
• Description (optional)
• Instance template
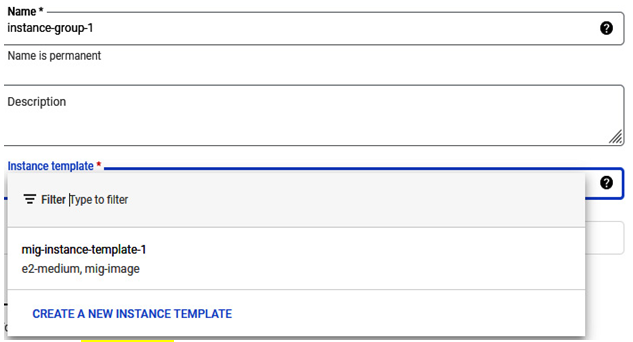
Figure 4.68 – The initial configuration section of the MIG
In the location section, we can choose single or multiple zones. If a single zone is selected, a target distribution shape is not possible. We have the option of Even, Balanced, and Any. Choose the desired configuration option:
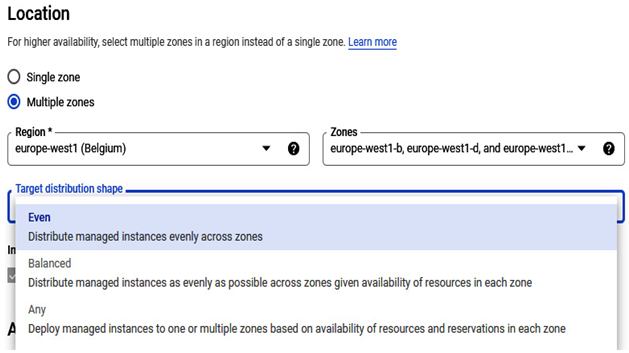
Figure 4.69 – The MIG in a multiple-zone configuration
3. In the Autoscaling section, we can use autoscaling mode. We can choose from On, Scale out, and Off:
Figure 4.70 – Autoscaling options
4. There is also an option to define the minimum and maximum number of instances:

Figure 4.71 – Autoscaling mode with possibility to configure minimum and maximum amount of instances
In the Autoscaling metrics section, we can choose when the autoscaling event happens. As the metric type, we can choose from either HTTP load balancing utilization or Cloud Monitoring metric under CPU utilization:
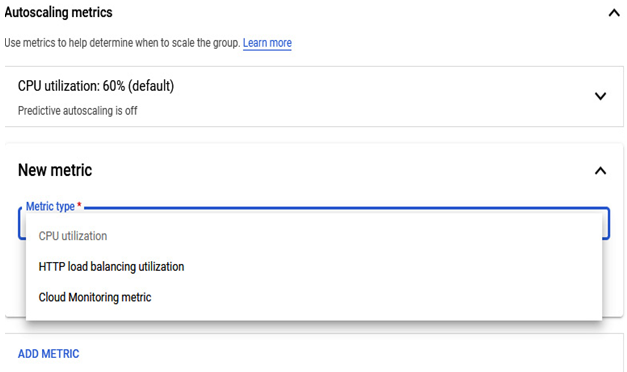
Figure 4.72 – Autoscaling metrics
- In the cool-down section, we can specify how long it takes for the application to initialize from boot time until it is ready to serve. This is a critical section, as some applications take a moment to start. If the application start exceeds the cool-down period, your monitoring metrics might detect that the application doesn’t work and initiate an autoscaling event, deleting the monitored instance. We want to avoid this situation, and it is a general best practice to measure the application startup.
- To better define scale-in controls, we can enable additional settings, as shown in the following screenshot:
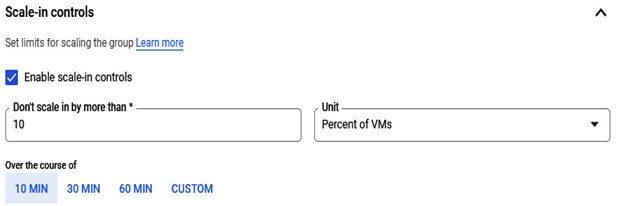
Figure 4.73 – Autoscaling metrics
7. In the Autohealing section, we can create detailed health checks for our application:
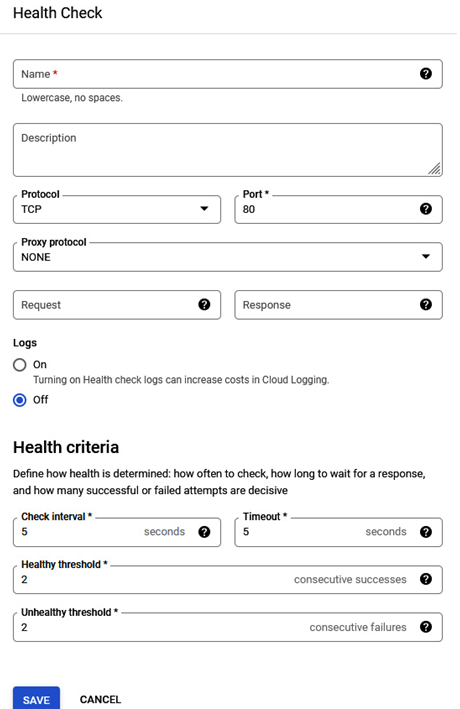
Figure 4.74 – The Health Check configuration
- The last section of the MIG is the Port mapping section. It is used to map the incoming traffic to a specific port number, together with HTTP load balancing:

Figure 4.75 – The Port mapping options
It might take a moment to create all instances, depending on the number of instances configured. You can check how many of them have been made in the Number of instances section:
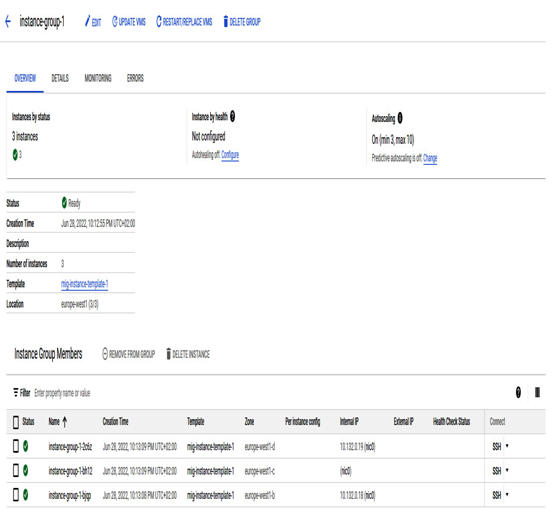
Figure 4.76 – Managed instance group created and ready for usage
In the DETAILS section, we can see the template information, update the parameters, and configure many options.
