As with any other service in Google Cloud, the Kubernetes Engine API must be enabled before using the service. Once the API is enabled, we can proceed with our Kubernetes cluster creation. As mentioned, a GKE deployment can be created with two modes—Autopilot and Standard. We will choose the Standard mode, but we encourage you to try both ways during the learning phase.
We start with Cloud Console in GKE:
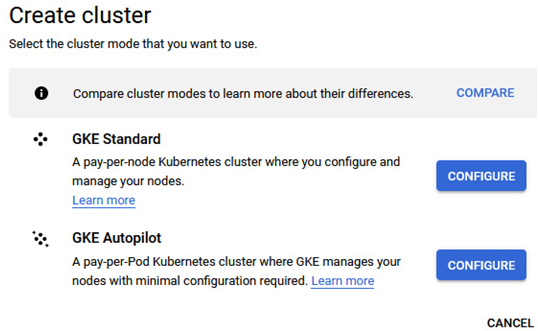
Figure 5.12 – Initial GKE cluster creation selection popup
If you are still unsure which GKE cluster mode you should choose, the following screenshot will help you decide:
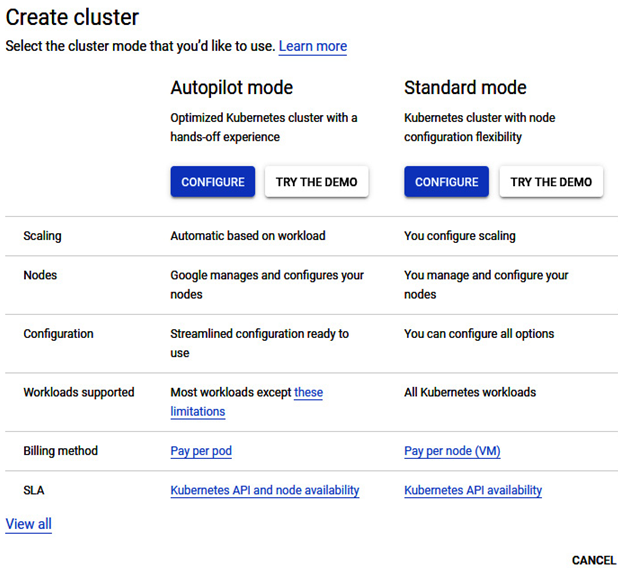
Figure 5.13 – Shortened GKE cluster comparison
Both architectures were described in the previous section about GKE architecture. Now, proceed as follows:
- In Cloud Console, we need to provide the name of the cluster.
- A quite important decision is whether the GKE cluster deployment is zonal or regional, as described in the GKE architecture section. We will proceed with the zonal deployment:
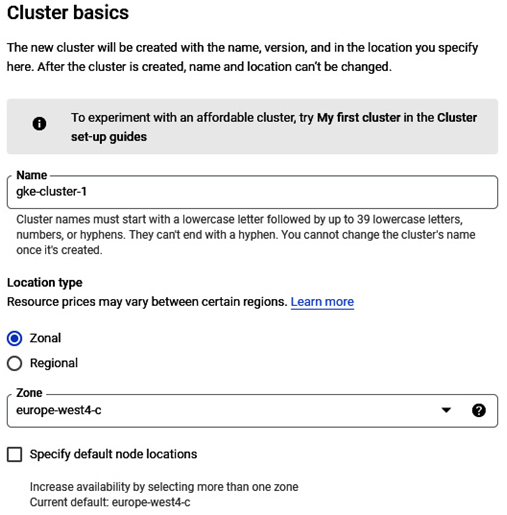
Figure 5.14 – GKE cluster basics (name and location type)
- In regional Standard GKE, we can specify default node locations. By selecting that field, we know where the control plane zone is:
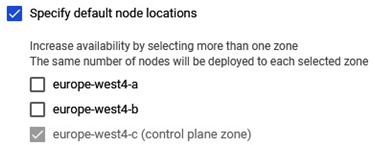
Figure 5.15 – GKE cluster basics (default node locations setting)
- In the Control plane version section, we can choose either the static or release channel control plane version:
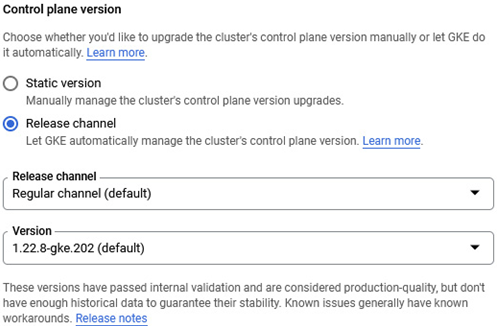
Figure 5.16 – GKE cluster basics (control plane version section)
- Once we provide all cluster basics values, we can proceed with the node pools section.
- As described in the GKE architecture section, the pool is the actual part of our GKE where containers will be running. There are many options to choose from when creating a default node pool.
- GKE allows us to pick many operating system images to run on cluster nodes:
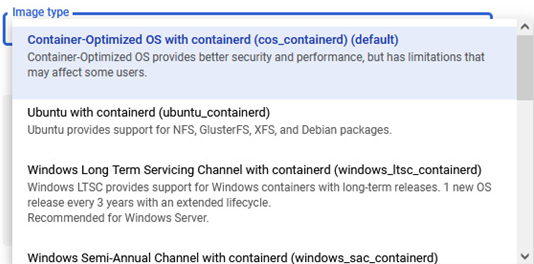
Figure 5.17 – GKE node pool (image type selection)
- Machine configuration is an integral part of node pool creation. Once created, changing the node pool machine type is impossible. Creating a new node pool and migrating workloads is necessary to change the machine type:
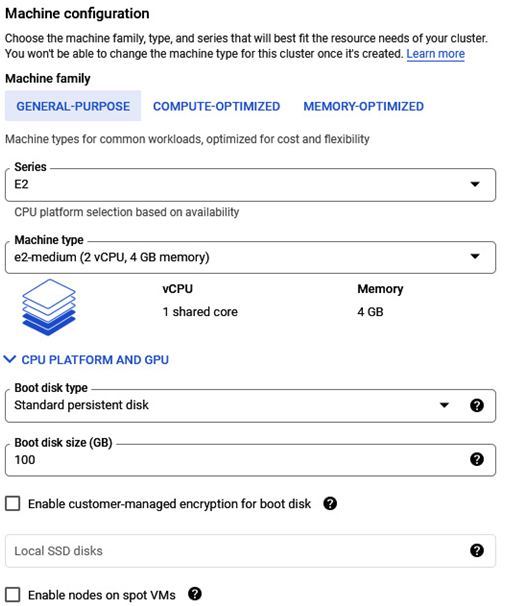
Figure 5.18 – GKE node pool (Machine configuration section)
- In the Networking section, we can specify the Maximum Pods per node setting, network tags, and a range of node pool Pod addresses:
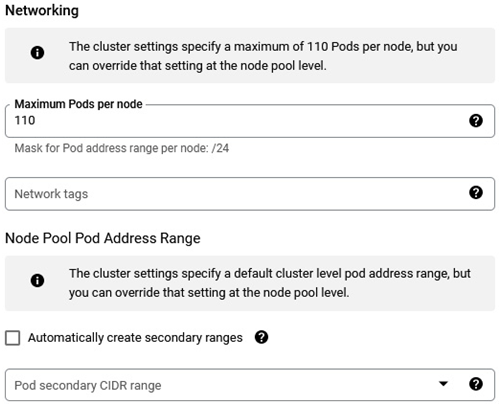
Figure 5.19 – GKE node pool (Networking section settings)
- In the Node security section, we can specify the service account used by applications running on node pool VMs:
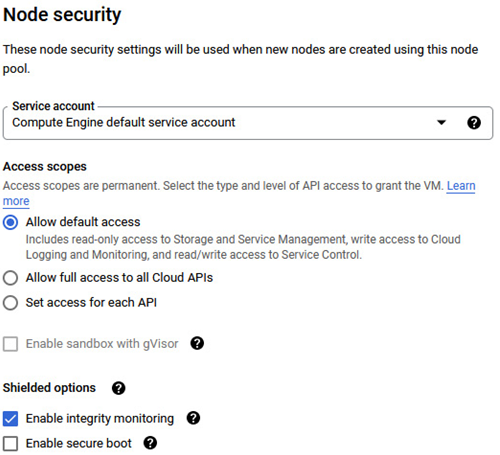
Figure 5.20 – GKE node pool (security settings)
- We can add labels and node taints in the Node metadata part of node pool creation:
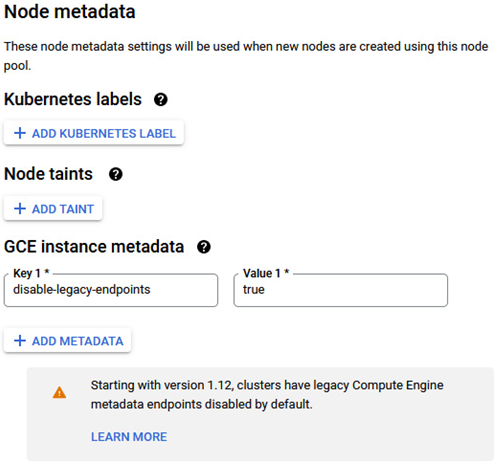
Figure 5.21 – GKE node pool (node metadata settings)
- After a few minutes, the Standard GKE cluster is operational and ready to receive containerized workloads:

Figure 5.22 – GKE cluster successfully created
In the next section, we’ll create GKE clusters using a CLI.
