Blob-level tiering
Blobs can be assigned with the desired access tier while you upload them to the container (see Figure 2-42). You can also change access tier among the Hot, Cool, Cold, or Archive tiers(because usage patterns change) without having to move data between accounts. All requests to change tier will take place immediately between Hot and Cool tiers. Additional storage costs will occur when changing tiers because the data must be read at the current tier and then writ- ten at the new tier.

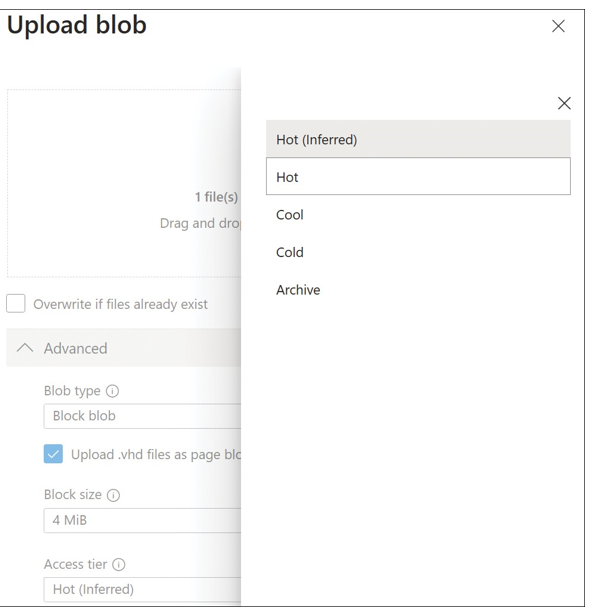
FIGURE 2-42 Changing the access tier while uploading the blobs to a container When the access tier is changed, the access tier’s Last Modified property will be updated with the time when the most recent change was made to the tier (see Figure 2-43).
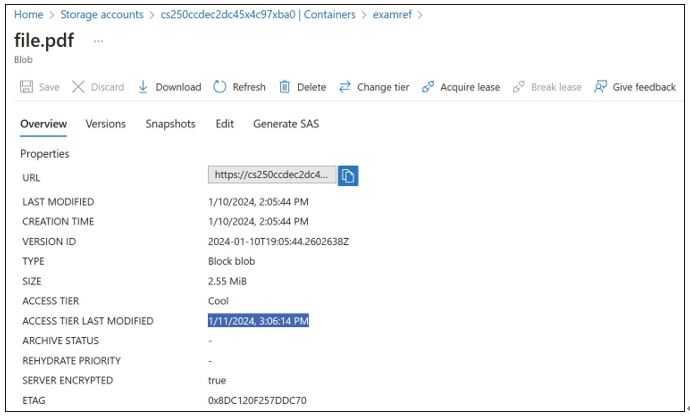
FIGURE 2-43 Access Tier Last Modified property for the blob
Change the access tier
The access tier can be changed at either the account level or the individual blob level. At the account level, you can set the access tier in the Configuration blade (the default option unless assigned it explicitly) or by using the new Lifecycle Management feature. At an individual blob level, the same can be achieved by using the Change Tier option for the blob.

To make a change at the account level, browse to the storage account, open the Configura- tion blade, and change Access Tier (Default) to Cool or Hot (see Figure 2-44).
Similarly, to make a change at blob level, browse to a blob, click Change Tier, and select the access tier from the menu. Your options are Hot, Cool, Cold, or Archive (refer to Figure 2-42).
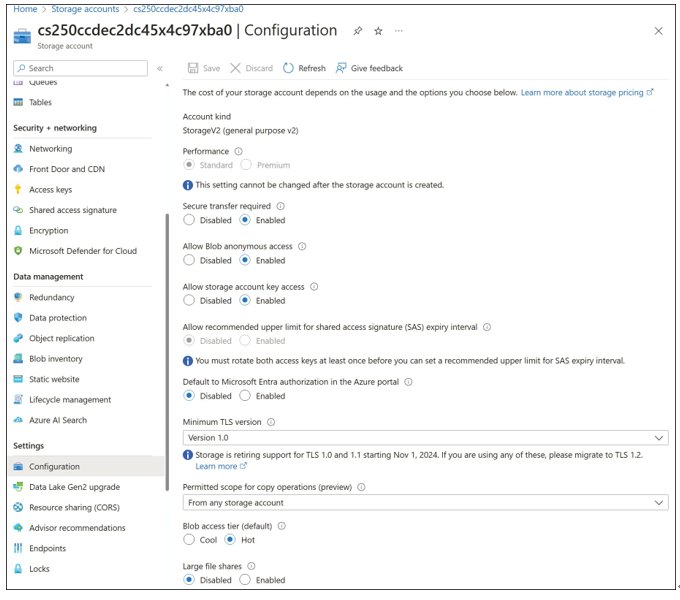
FIGURE 2-44 Change the access tier
Configure soft delete, versioning, and snapshots
Azure Storage provides several options for recovering data that might be accidentally deleted or overwritten. These options include snapshots, soft delete, and version tracking for blobs and files.
Soft delete
The default behavior when you delete a blob is that the blob is deleted and lost forever. With soft delete, you can recover your data when blobs or blob snapshots are deleted even in the event of an overwrite. This feature must be enabled on the Azure storage account, and a reten- tion period must be set for how long the deleted data is available (see Figure 2-45).
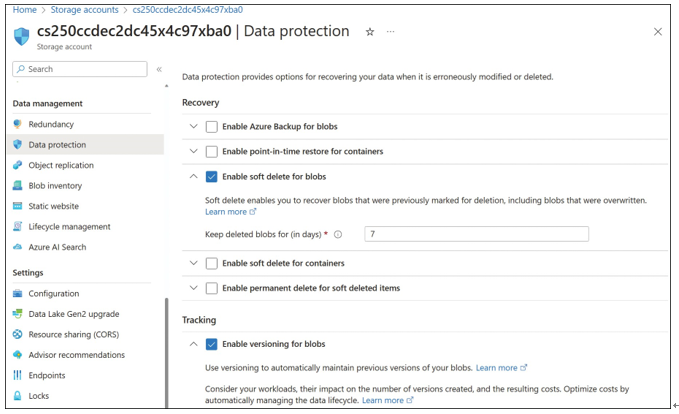
FIGURE 2-45 Enabling soft delete on an Azure storage account
EXAM TIP
The maximum retention period for soft delete is 365 days.

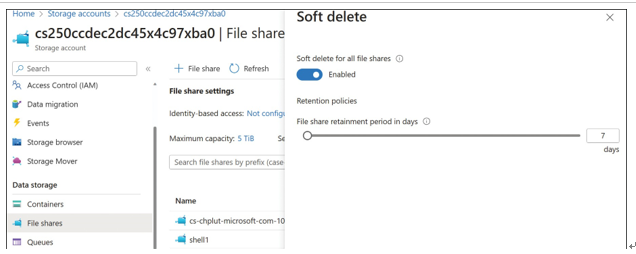
Soft delete can also be configured for SMB-based Azure Files shares. It operates the same as blobs where data can be recovered if accidentally deleted. Soft delete is configured at the storage account level for all shares in the account. To configure soft delete for Azure Files, navigate to the storage account and select File Shares. On the File Shares blade, select Disabled next to Soft Delete. In the Soft Delete dialog box, set the toggle to Enabled and then configure the retention policy. The default retention policy is 7 days, but can be configured from 1 to 365 days, as shown in Figure 2-46.
