Chat (Live Agent) Setup flow
Let’s start with the Chat (Live Agent) Setup flow (we are accustomed to these kinds of flows since we have already used them for Knowledge and Omni-Channel setup).
Go to Service Setup | Recommended Setup | View All and look for Chat With Customers. The wizard will guide you to the following steps:
- Add a new queue and an agent group (name the queue Incoming Web Chats and the agent group Chat Agents) and assign users to the group (we can add them later). This step sets up the presence and queue for the chat work items (as we have already seen in Omni-Channel). Users need to have an additional Live Agent license and they are assigned the Live_Agent_Setup_Flow permission set for presence.
- Add new routing configuration for the web chat (set the priority to 1 and change the high-priority cases to 2).
- Adjust the agents’ workload by setting a proper chat work item size and the agent’s capacity. Leave the agent’s capacity as it is (10, in this case, like the previous configuration) and set the work item size to 2 (agents can easily take care of more than one chat at a time).
- Live Chat will be used outside the CRM or at least on a customer community. If you don’t have a Salesforce Site or a community already set up, this step also creates a new empty site. Fill in the Website URL textbox with the community domain we set up earlier (https://adv-admin-community-01-developer-edition.eu19.force.com) and select our community as the Salesforce Site Domain.
- Now, we’ll be asked how we want to link chats to our CRM data, such as lead (if the chat is meant for sales), case and contacts, or only contacts (for service purposes). Let’s select Cases and Contacts (select a record type for the contact and case if requested).
- Let’s leave the offline support as disabled (this creates a form that the customer can fill in if the chat is not available).
Voilà—the chat is almost ready. A snippet of code will be displayed (you can get it from Setup | Chat (Formerly Live Agent) | Chat Buttons and Invitations) and it should only be used outside Salesforce (if we plan to add the web chat feature to a custom website and not a community).
The setup flow will have created a new queue (go to Setup | Routing Configurations and select Incoming Web Chat). Here, we’ll see the Incoming Web Chat-related queue.
There is also a new Presence Configuration called Chat Agents. As we mentioned in the previous section, users can only be linked to one presence configuration at a time (the old Tier1 Agents configuration has no user associated with it now and can be safely deleted).
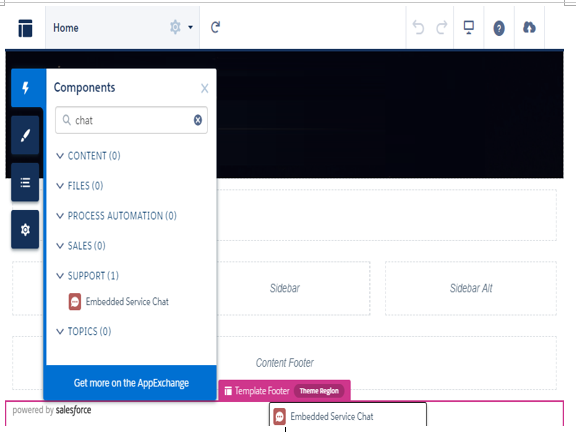
Go back to your community. Now, we want to add a new component called the Embedded Chat (formerly Snap-In) so that we can use the chat from within the community.
Click on Setup | All Communities and select the Builder link next to the Awesome Service Site community. Now, click on the Lightning icon (components) on the left-hand side of the toolbar, search for the embedded chat standard component, and place it in the lowermost section of the template, as shown in the following screenshot:

Adding the snap-in component to the community template
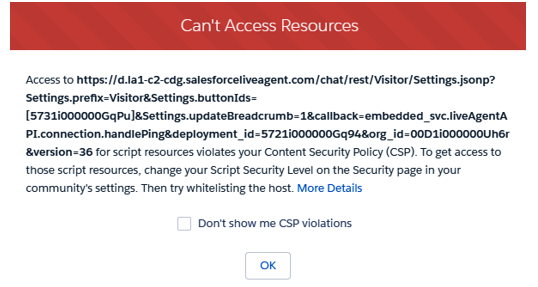
If you refresh the page, you’ll get a scary error:

Snap-in error for the Content Security Policy
