We have an application called my-nginx running as a deployment with two Pods. We want to create a service of type ClusterIP for the workload running under the name my-nginx.
To create a service of type ClusterIP, we can use the following code:
apiVersion: v1
kind: Service
metadata:
name: my-nginx
labels:
run: my-nginx
spec:
ports:
– port: 80
protocol: TCP
selector:
run: my-nginx
The preceding code can be downloaded from the following GitHub page: https://raw.githubusercontent.com/kubernetes/website/main/content/en/examples/service/networking/nginx-svc.yaml.
We recommend saving the file’s content to the local disk so that we can use it as input for the kubectl command.
To create a service using the kubectl command-line tool, we need to run the following command: kubectl apply -f YOUR_FILENAME.yaml.
After applying the YAML file, a service of type ClusterIP is created. We can check if it is created by running the kubectl get services command and then kubectl describe service SERVICE_NAME:
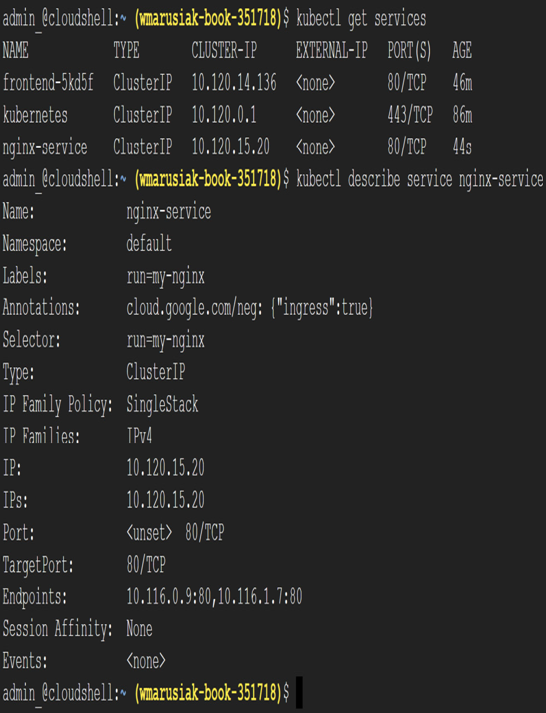
Figure 6.62 – Newly created ClusterIP service details
Now, let’s learn how to modify services running on the GKE cluster.
Modifying services used in GKE will be similar to other parts of the GKE modification.
Cloud console
Modifying a service in Cloud console will rely on editing existing services available for us in GKE.
We have a nginx-service service from the previous section of the book available. To edit it, we will go to the Services & Ingress section, click on it, and then click the EDIT button:
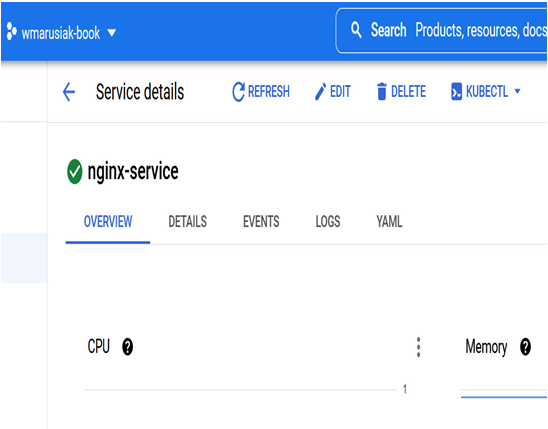
Figure 6.63 – Modification of a service in Cloud console
Depending on the service, your edit might look different than ours. In our case, we will change the port from 80 to 8080. Port and targetPort are different ports where we must distinguish how we access the application. Port is the actual port on the Pod, and targetPort is the open port on the node or cluster level open to the requests:
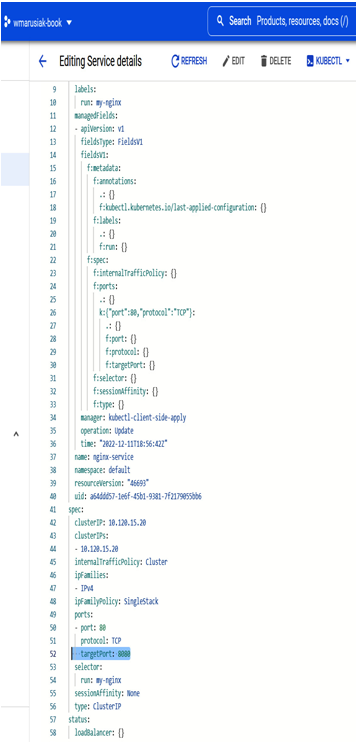
Figure 6.64 – Modification of the service by using Cloud console
After saving the file in the Cloud console editor, the service description is updated and reflects our changes:
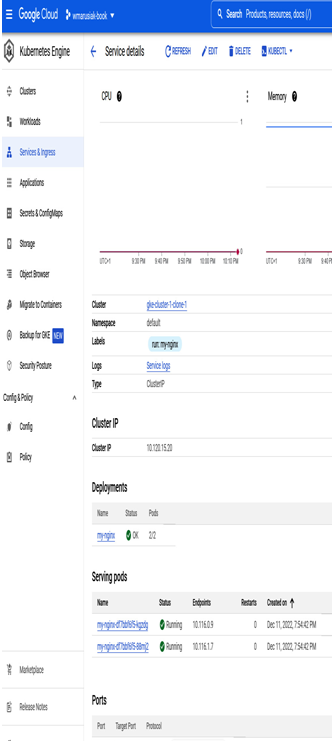
Figure 6.65 – Service update finalized by using Cloud console from target port 80 to 8080
After successfully modifying the service in Cloud console, we move on to the same task using the kubectl command-line tool.
Command line
Modification of the service by using the kubectl command-line tool allows us to change the service configuration easily.
We need to list services, get the service’s configuration, modify it, and apply the new values to modify the service. Here’s how we can do that:
- To list all existing services, we can use the kubectl get services command:

Figure 6.66 – Listing of existing services
2. Once we have the name of the service, we can get its configuration by using the kubectl describe service SERVICE_NAME command:
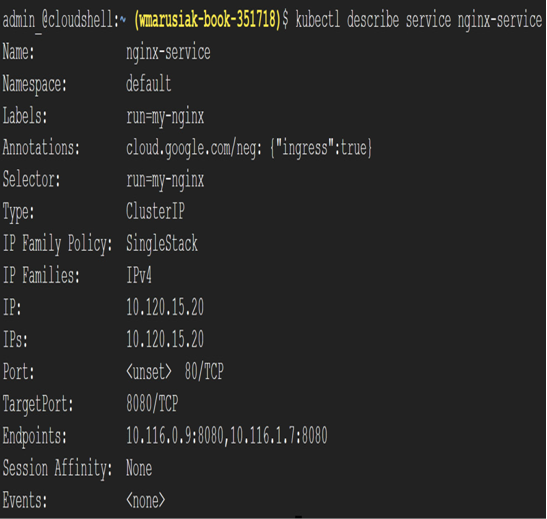
Figure 6.67 – Detailed description of running the GKE service
3. To edit the configuration itself, we need to use the kubectl edit service SERVICE_NAME command, resulting in the following information:
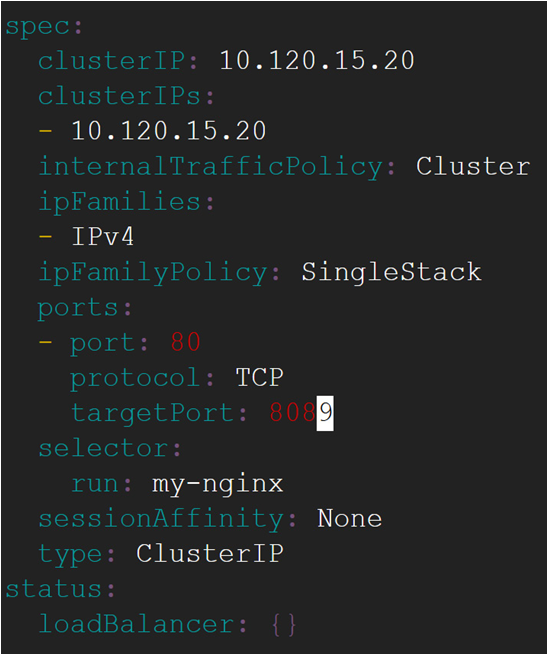
Figure 6.68 – Editing GKE service in a preferred text editor
4. After saving the file, the changes are applied immediately.
5. Execution of the kubectl describe service YOUR_SERVICE_NAME command shows the changes applied:
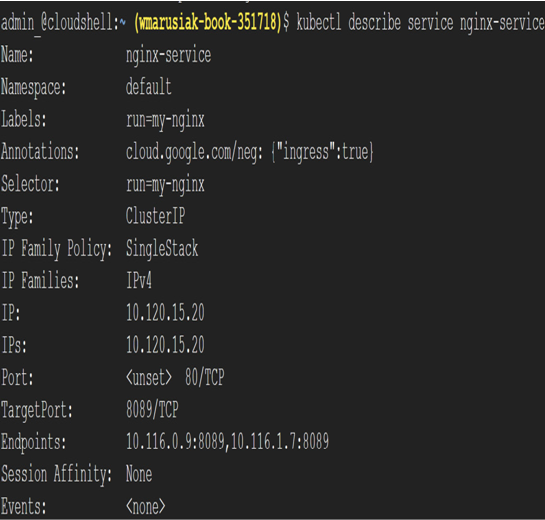
Figure 6.69 – Editing GKE service in a preferred text editor
6. The description of the service has changed—TargetPort has changed from port 8080 to 8089.
Now that we have learned how to modify services, we need to learn how to remove them.
