In addition to built-in roles available in Azure, you might need to create a custom role to provide a set of permissions that are not available in any of the built-in roles. Custom roles can be created and assigned through the Azure portal, Azure PowerShell, Azure CLI, and REST API. This chapter primarily covers how to create a custom role using the Azure portal.

There are three ways you can create custom roles in the Azure portal:
- Clone from the existing built-in roles available
- Start from scratch
- Start from a JSON file to define the custom permissions
To clone a built-in role, open the Access Control (IAM) blade by accessing a subscription or resource group and then choosing Add, Add Custom Role, as shown in Figure 1-16.
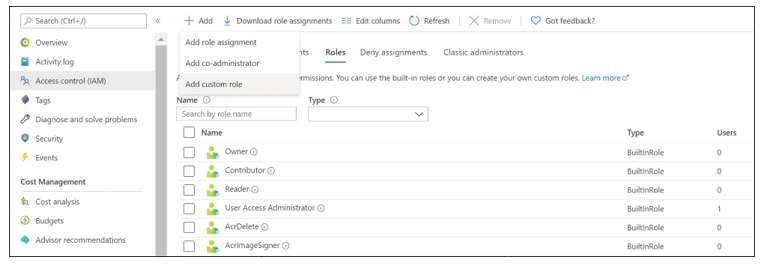
FIGURE 1-16 Add Custom Role option in the Access Control (IAM) blade
On the Create A Custom Role blade, next to Baseline Permissions, select Clone A Role. Next, from the Role To Clone drop-down menu, select the desired role, such as Virtual Machine Con- tributor, as shown in Figure 1-17. You can select the role with the nearest identical permissions from the built-in roles.
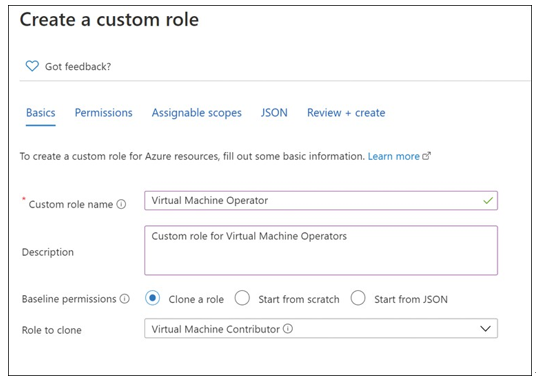
FIGURE 1-17 Creating a custom role
Click Next to open the Permissions tab, shown in Figure 1-18. This tab displays all the permissions associated with the built-in role you selected in the Basics tab.
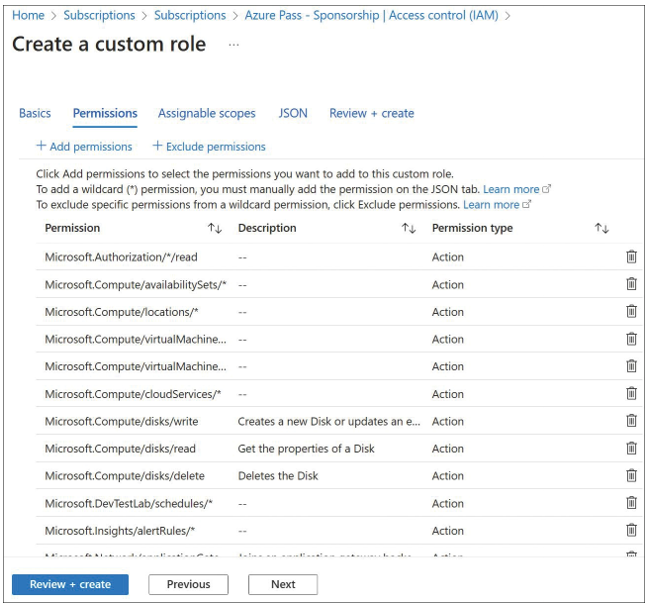
FIGURE 1-18 Add or exclude permissions while creating a custom role
When you click Add Permissions, you can search from all the different permissions available from the catalog. For example, type virtual machine, as shown in Figure 1-19. You can select Microsoft Compute to access operations available for this resource provider.
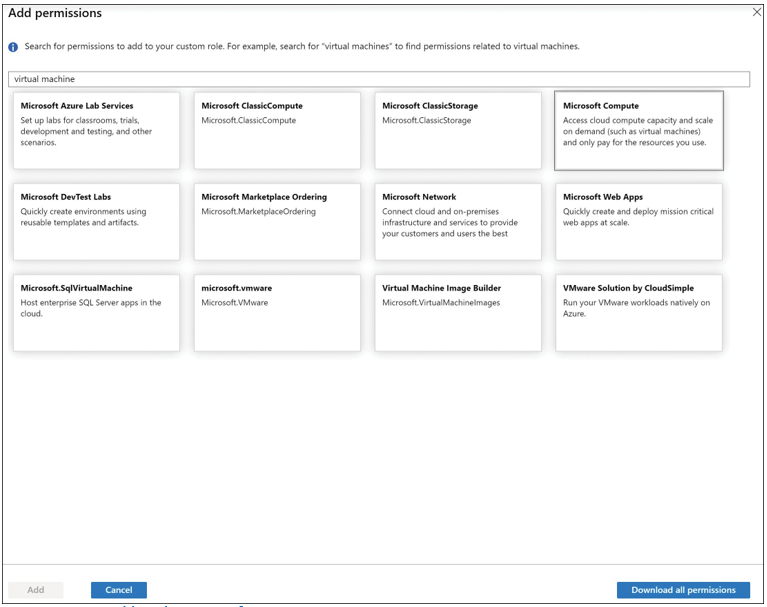
FIGURE 1-19 Adding the Microsoft Compute permission
Once you select Microsoft Compute, you can select specific permissions from the Actions and Data Actions tabs. The Actions tab contains the operations that a role can perform, and the Data Actions tab contains the operations that a role can perform on the data within an object. Similarly, if you want to exclude permissions (previously shown in Figure 1-18), the Not Actions and Not Data Actions tabs contain a list of permissions that you can add to the role that it is not allowed to perform based on the selection (see Figure 1-20).
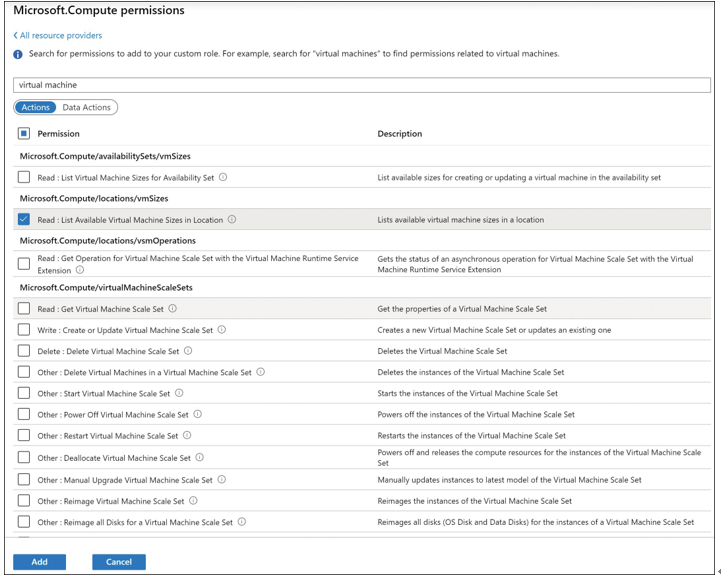
FIGURE 1-20 Permission list under the Actions tab
After you select the required permissions, you must select Add Assignable Scopes to define a scope for this custom role. The scope can be defined as a Management Group, Sub- scription, Resource Group, or Resource Level. The custom role must have at least one valid scope assigned (see Figure 1-21).

FIGURE 1-21 Assignable scopes selection while creating a custom role
Select Next or the JSON tab to display the JSON (JavaScript Object Notation) code based on the selection made on the prior screens. This code can be downloaded as a .json file, or it can be copied to reuse later. You can proceed to the Review + Create tab to create the custom role (see Figure 1-22).
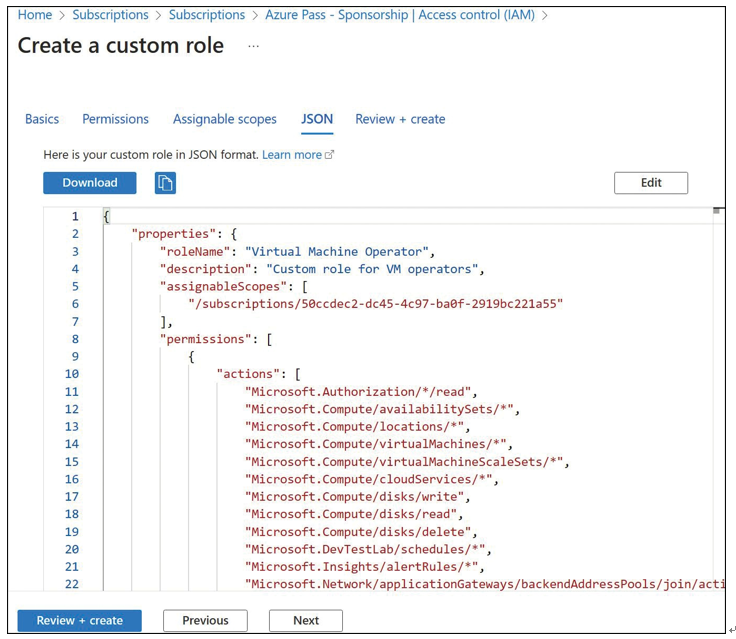
FIGURE 1-22 JSON view while creating a custom role
Newly created custom roles can be accessed from the Roles tab (see Figure 1-23). Custom roles appear in the Azure portal with an orange resource icon.
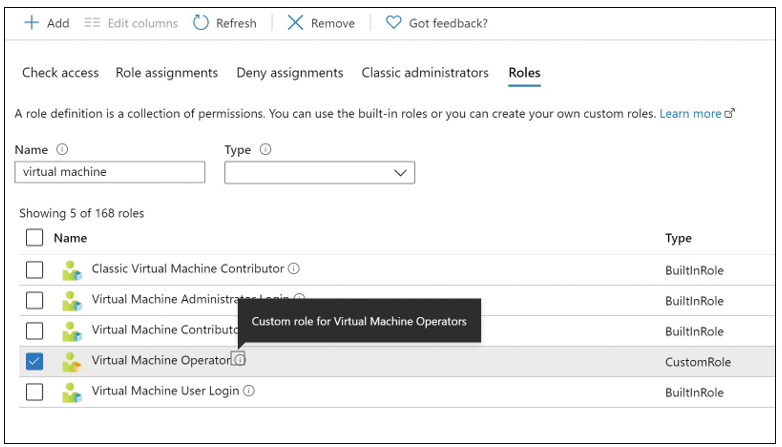
FIGURE 1-23 Roles selection while creating a custom role
Alternatively, built-in roles can be cloned by selecting a role from the Roles tab. For exam- ple, you could select Virtual Machine Contributor, click the ellipsis (…), and then select Clone (see Figure 1-24).
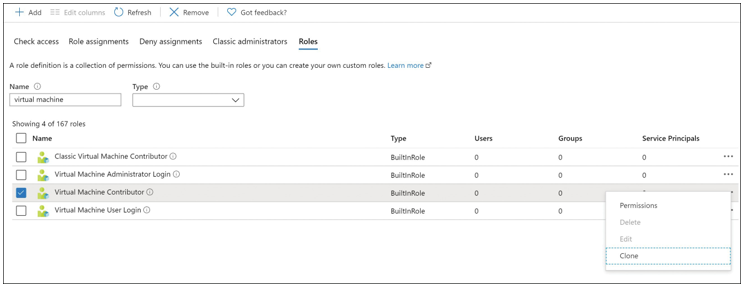
FIGURE 1-24 Cloning a role

You can also create a custom role by choosing Start From Scratch from the Baseline Permis- sions. This option could be time-consuming because you need to select all the permissions, one by one, to create a custom role from scratch.
Similarly, custom roles can be defined using a JSON file by selecting Start From JSON under Baseline Permissions. The JSON file contains the role definitions:
- A name represented by the Name attribute
- An identifier represented by the Id attribute
- A description represented by the Description attribute
A flag that denotes whether the role is custom or built-in is represented by the IsCustom attribute, which is set to false for built-in roles; this should be set to true when authoring cus- tom roles.
The actions that can or cannot be performed within the Azure management plane are represented by the Actions[] and NotActions[] attributes, respectively.
Optionally, the scopes at which the role is available through the AssignableScopes[] attribute.
