Azure Backup service can be used to back up and restore various cloud as well as on-premises resources. Recovery Services vault is used to enable Azure Backup and to configure the backup policies.
For Azure workloads, the Azure Backup service can back up the following resources:
- Virtual machines
- SAP HANA databases running in an Azure VM
- Azure file share
- SQL Server databases running in an Azure VM
When you back up an Azure virtual machine, you can restore an entire virtual machine or you can restore individual files from the virtual machine, and it is quite easy to set up. To back up a VM in Azure with Azure Backup, open the Recovery Services vault, and click Backup under Getting Started. From the Where Is Your Workload Running? drop down menu, select Azure, and from the What Do You Want To Backup? drop down menu, select Virtual Machine. After making these selections, click Backup, as shown in Figure 5-64.
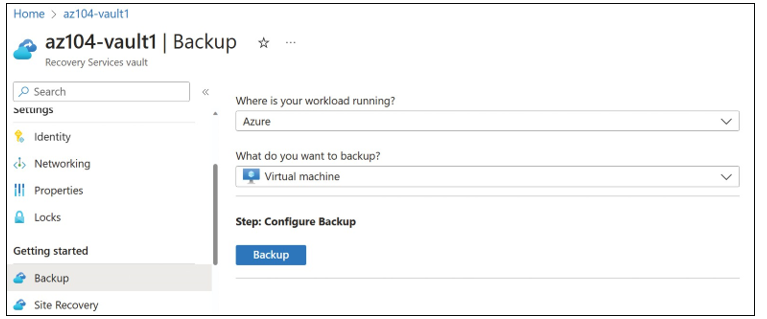
FIGURE 5-64 Configuring Azure Backup to protect virtual machines
On the Configure Backup blade, first select whether to back up using a Standard or Enhanced policy types. Standard policies are used for simple backups of non trusted launch VMs, or VMs that aren’t using ultra disks or Premium SSD v2 disks, either of which require Enhanced. After selecting the type, select the specific policy that matches that type, or choose the default policy. Finally, click Add to add the VM to the backup configuration. A completed configuration using a Standard policy for VM1 is displayed in Figure 5-65.
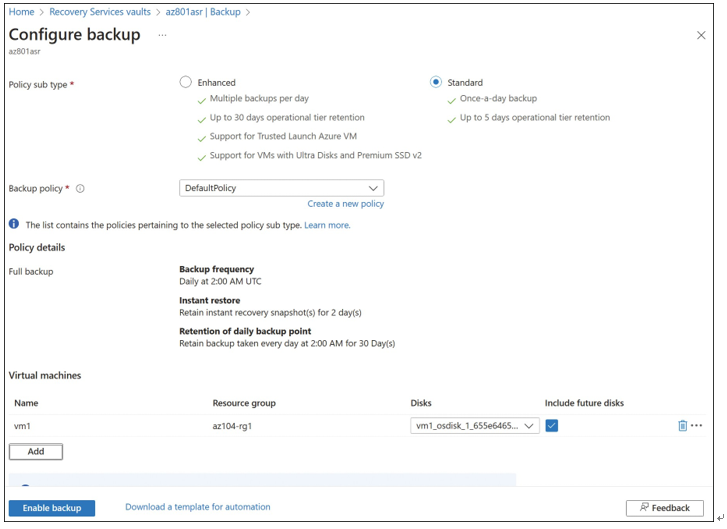
FIGURE 5-65 Azure Backup configuration
After the VMs are selected, click Enable Backup.

When you click Enable Backup, behind the scenes, the VMSnapshot (for Windows) or VMSnapshotLinux (for Linux) extension is automatically deployed by the Azure fabric controller to the VMs. This makes snapshot-based backups possible, which means a snapshot of the VM is taken first, and then this snapshot is streamed to the Azure Storage associated with the Recovery Services vault. The initial backup is not taken until the day/time configured in the backup policy, though an ad-hoc backup can be initiated at any time. To do so, navigate to the Protected Items section of the Recovery Services vault properties, click Backup Items, and click Azure Virtual Machine under Backup Management Type. The VMs that are enabled for backup are listed here. To begin an ad-hoc backup, right-click a VM and select Backup Now, as shown in Figure 5-66.
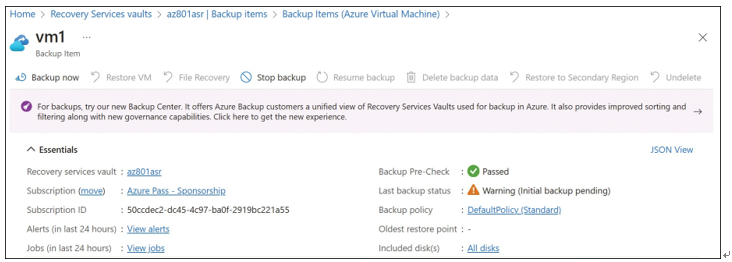
FIGURE 5-66 Starting an ad-hoc backup
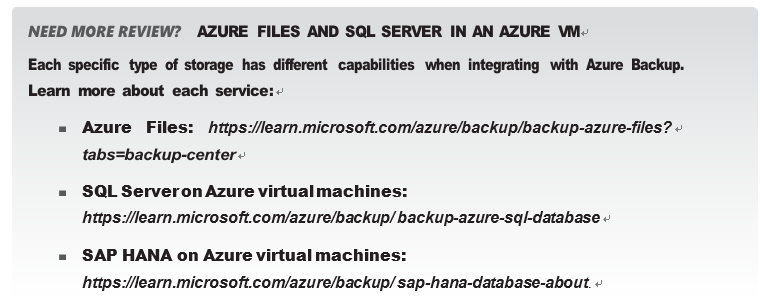
Azure Backup also directly supports the ability to back up and restore data from Azure Files, SQL Server databases, and SAP HANA databases on Azure virtual machines. It is a good idea to have a basic understanding of the capabilities because they might appear on the exam.
After backing up a virtual machine using Azure Backup, there are two methods to restore data: Restore VM and File Recovery.
To restore a recovery point as a new virtual machine, open the Recovery Services vault, click Backup Items, click Azure Virtual Machine, and then click the virtual machine you want to restore from the list. You’ll see a list of all the restore points available for restoration, as shown in Figure 5-67.
Right-click the desired restore point and select Restore VM, or click Restore VM at the top of the page (refer to Figure 5-67).
You can then restore to a new virtual machine by selecting Create New, or you can restore over an existing virtual machine by selecting Replace Existing.
Figure 5-68 shows the Restore Virtual Machine blade with Create New selected. Here, you can specify the virtual machine name, resource group, virtual network, subnet, and storage account.
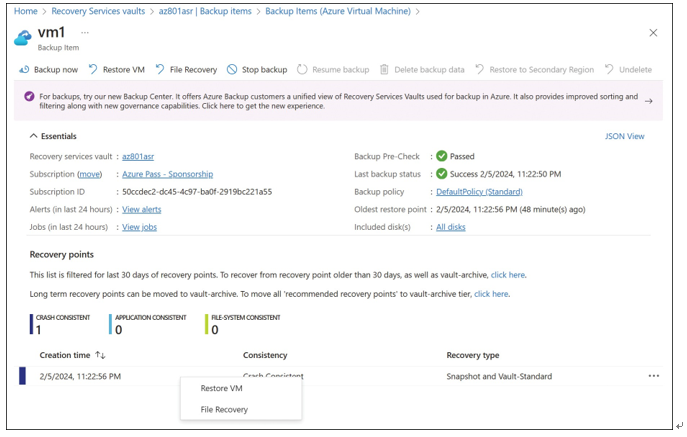
FIGURE 5-67 Available restore points for a virtual machine.
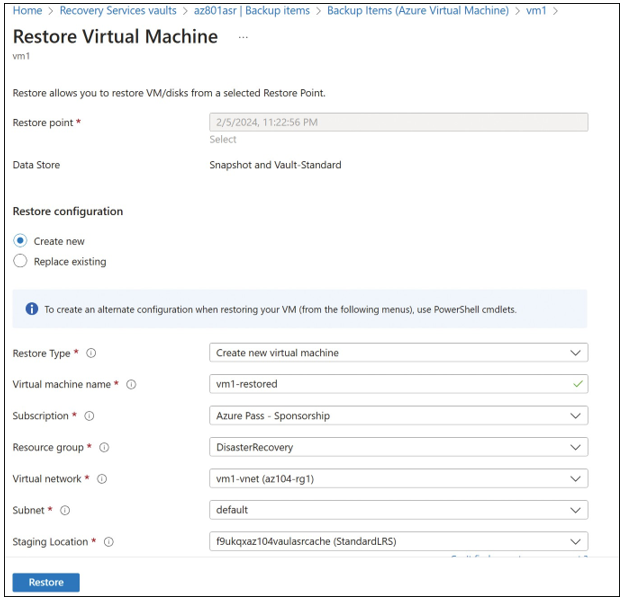
FIGURE 5-68 Restore to a new virtual machine
If you just need access to files from the virtual machine, click File Recovery at the top of the page shown previously in Figure 5-66 instead. From there, you can select the recovery point and then download a script that will mount the selected recovery point to another computer as local disks (see Figure 5-69). The disks will remain mounted for 12 hours so you can recover the needed data.
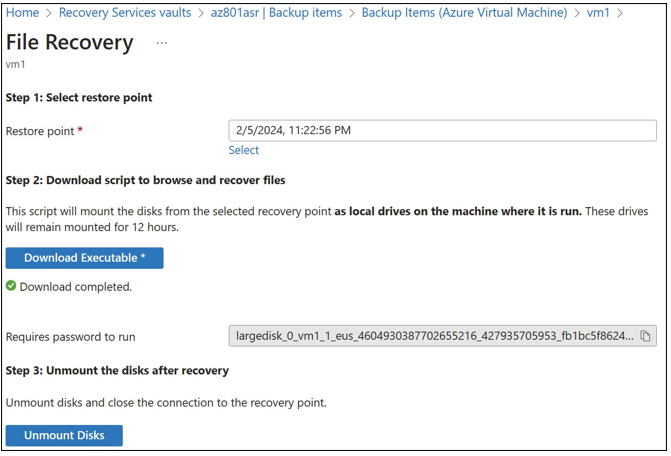
FIGURE 5-69 Restore to a new virtual machine
EXAM TIP
To restore a virtual machine that has encrypted disks, you also need to provide the Azure Backup service access to the key vault holding the keys. See https://learn.microsoft.com/ azure/backup/backup-azure-vms-encryption.

