Create an NSG using the Azure portal
To create an NSG using the Azure portal, follow these steps:
- Search for Network Security Groups. On the Network Security Groups blade, click Create.
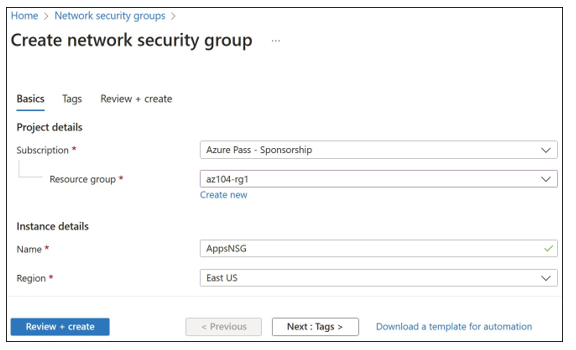
- On the Create Network Security Group blade, provide a name, the subscription where your resources are located, the resource group for the NSG, and the location. (The loca- tion must be the same as the resources you want to apply the NSG.) In Figure 4-24, the NSG will be created to allow HTTP traffic into the Apps subnet and be named AppsNSG.

FIGURE 4-24 Creating a network security group using the Azure portal
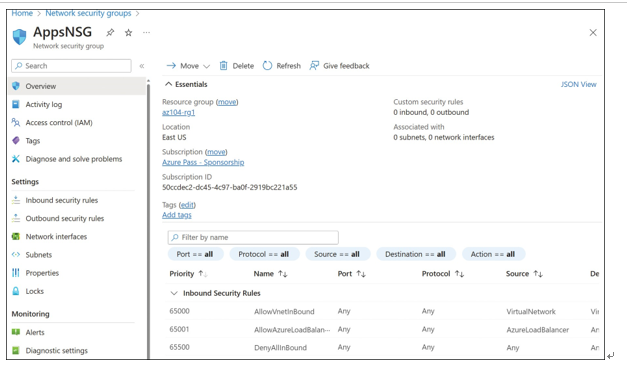
- After the NSG has been created, open the NSG Overview blade, as shown in Figure 4-25. Here, you see that the NSG has been created, but there are no inbound or outbound security rules beyond the default rules.

FIGURE 4-25 The NSG Overview blade, showing the inbound and outbound security rules
- Create the inbound rule for HTTP and HTTPS traffic: In the Settings area on the left, click Inbound Security Rules, and then click Add to open the Add Inbound Security Rule blade. Notice that you can choose Basic or Advanced mode, depending on the level of control required.
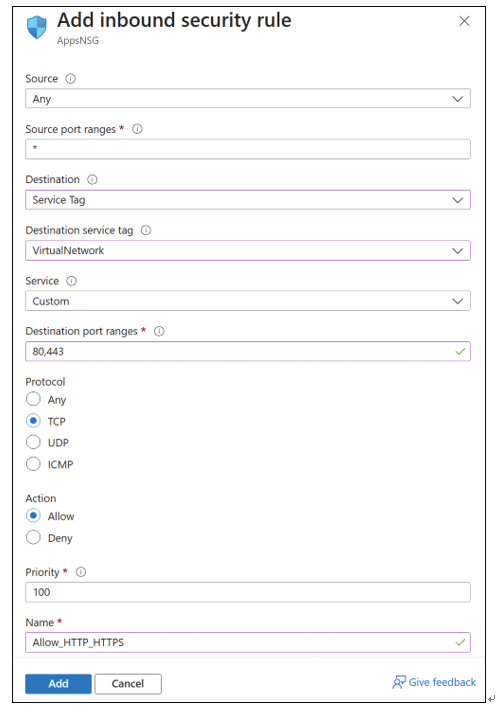
- To allow HTTP/HTTPS traffic on Port 80 and 443, complete the fields as shown here and
in Figure 4-26:
■ Source Any
■ Source Port Ranges *
■ Destination Service Tag
■ Destination Service Tag VirtualNetwork
■ Destination Port Ranges 80,443
■ Protocol TCP
■ Action Allow
■ Priority 100
■ Name Allow_HTTP_HTTPS
■ Description Allow HTTP and HTTPS inbound traffic on ports 80 and 443 - When you have completed the fields, click Add to create the NSG rule.


FIGURE 4-26 Adding an inbound rule to allow HTTP traffic
- Once the inbound rule has been saved, it will appear in the Azure portal. Review your rule to ensure it has been created correctly.
