Custom images are the best solution if you want to reuse the fully preconfigured operating system with custom applications and settings. It is possible to create custom instance images from source disks, images, snapshots, or images stored in Cloud Storage and use these images to create VM instances.
Console
Let’s create a custom instance image based on the existing disk. We encourage you to test other image sources as well.
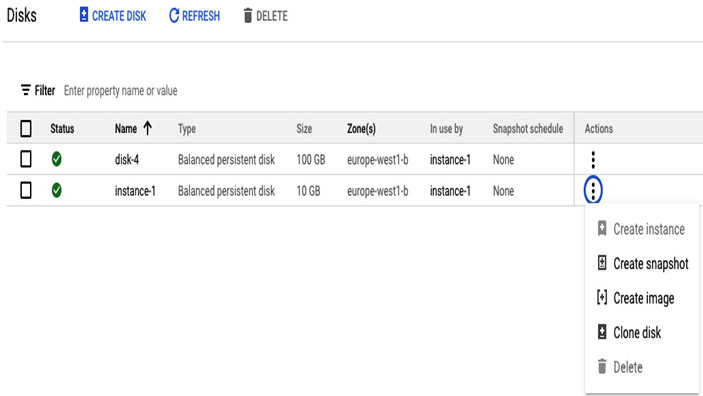
In the Cloud console, navigate to the Disks section in Compute Engine. Select the desired disk image used as the source image:

Figure 4.54 – Choosing a disk as a base for a new custom image
Before clicking Create image, it is recommended to stop the instance to guarantee that filesystem consistency is preserved. You can force image creation while the instance runs, but you must be aware of the possible consequences.
We need to provide the following information to create an image:
- Name
- Source: This can be a disk, snapshot, image, cloud storage file, or virtual disk in the VMDK or VHD format
- Source Disk
- Location: Multi-regional or regional
- Family
- Labels
- Encryption: This can be a Google-managed encryption key, a CMEK, or a CSEK
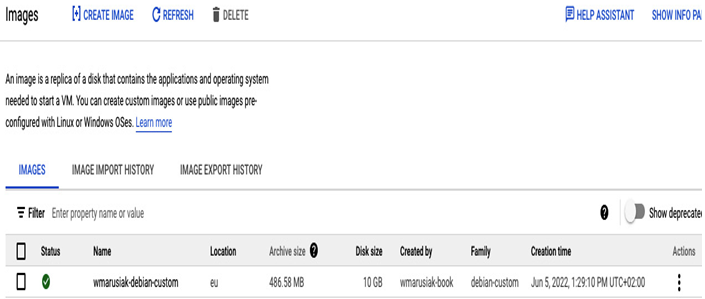
After a moment, the image is created, and then we can utilize this image to create new instances.

Figure 4.55 – A newly created custom image, visible in the Images section of the Cloud console
Images can be imported and exported – both operations are available in the Images section.
Command line
We can run the following command snippet to create an image from the existing disk:
gcloud compute images create IMAGE_NAME –project=PROJECT_NAME –family=IMAGE_FAMILY_NAME –source-disk=SOURCE_DISK_NAME –source-disk-zone=SOURCE_DISK_ZONE –storage-location=STORAGE_LOCATION
Similar to the actions performed in the Cloud console, an image created from the disk is made after initiating the commands.
Deleting an instance image
Deleting an instance image involves a few steps in the Cloud console and two stages in the command line.
Console
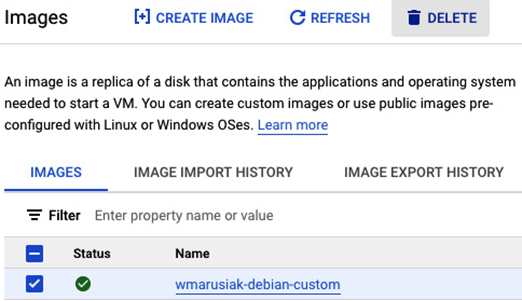
To delete an instance image in the Images section of Compute Engine, we need to select the desired image. Remember that it isn’t possible to delete the images provided by Google Cloud. We can only delete the images that we created.
To delete an image, select it and click DELETE:

Figure 4.56 – Deletion of an image in the Cloud console
Image deletion takes a moment and cannot be reversed.
Command line
Before we can delete an image, we need to know its name. To list all images and omit the ones from Google Cloud, run the following command:
gcloud compute images list –no-standard-images
If we don’t use the –no-standard-images switch, we will receive a list of all images available.
To delete the image, execute the following command:
gcloud compute images delete IMAGE_NAME
On the command line, we will receive confirmation that the image is deleted. You can execute the previous command to list all the images again and check whether it is listed.
In the next section, we will perform network-related activities.
