Deploy resources from a template
You can deploy templates using the Azure portal, the command-line tools, or directly using the REST API. You’ll start with deploying a template that creates a virtual machine using the Azure portal. To deploy a template from the Azure portal, search for Deploy a custom template.
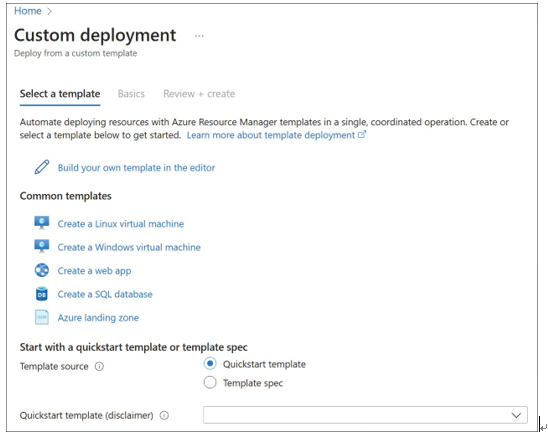
On the Custom Deployment blade, choose to either build your own template in the portal, or select a common template from the gallery, as shown in Figure 3-1.
From there, you have the option to build your own template using the editor in the Azure portal (you can paste your own template in or upload from a file using this option, too) or choose from one of the most common templates. Last of all, you can search the existing sam- ples in the Quickstart samples repository in GitHub and choose one of them as a starting point.
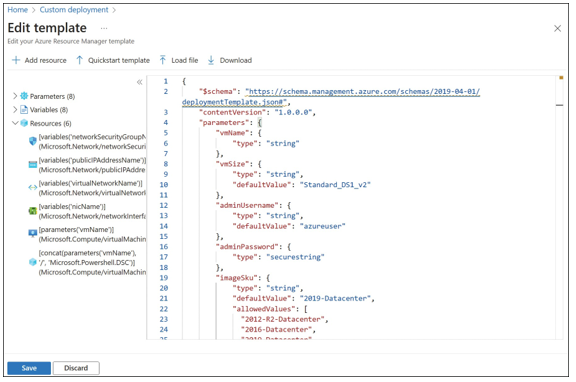
Click Build Your Own Template In The Editor to paste in template code directly. You can author and then deploy templates using the Azure portal for simple testing. Figure 3-2 shows the Edit Template blade.

FIGURE 3-1 Template deployment options

FIGURE 3-2 Editing a template using the Azure portal editor

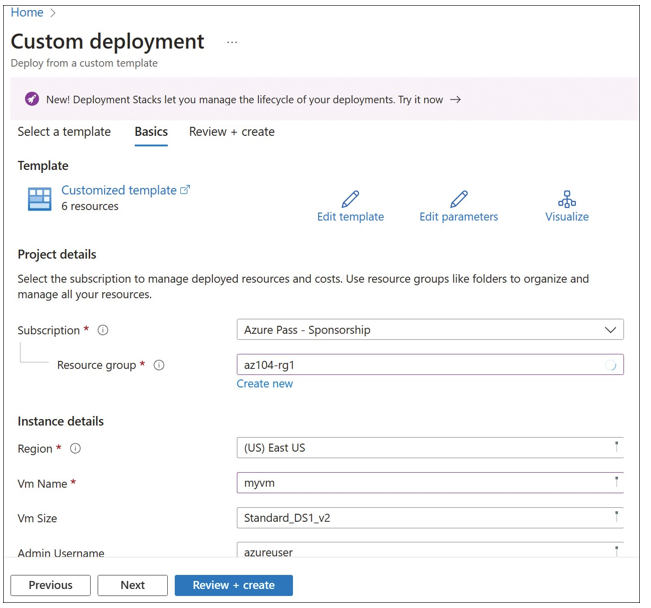
Clicking Save on the Select A Template tab takes you to the Basics tab shown in Figure 3-3, where you can specify the resource group and any parameters required to deploy the template.

FIGURE 3-3 The Custom Deployment blade

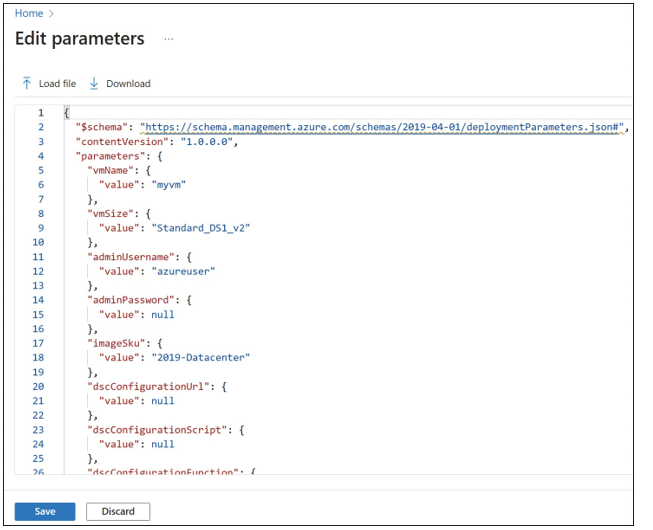
Click Edit Parameters to edit a JSON view of the parameters for the template, as shown in Figure 3-4. This file can also be downloaded and is used to provide different behaviors for the template at deployment time without modifying the entire template.
Common examples of using a parameters file:
- Defining different instance sizes or SKUs for resources based on the intended usage(small instances for test environments for example)
- Defining different number of instances
- Defining different regions
- Defiing different credentials
It is recommended that you use the securestring type for the parameters when passing confidential data, such as passwords and secrets.

FIGURE 3-4 Editing template parameters using the Azure portal

The last step to creating a template using the Azure portal is to click Review + Create. This will validate the parameters that you have customized and provide a summary of what will be deployed. Click Create to trigger the deployment.
The Azure command-line tools can also deploy resources using templates. The template files can be located locally on your file system, accessed via HTTP/HTTPS, or uploaded to your cloud shell environment. Common deployment models include storing the templates in a source code repository or an Azure storage account to make it easy for others to deploy the template.
EXAM TIP
The parameters of a template can be passed to the New-AzResourceGroupDeployment cmdlet using the TemplateParameterObject parameter for values that are defined directly in the script as .json. The TemplateParameterFile parameter can be used for values stored in a local .json file. The TemplateParameterUri parameter for values that are stored in a .json file at an HTTP endpoint.
EXAM TIP
The parameters of a template can be passed to the az group deployment create command using the parameters section for values that are defined directly in the script as .json. The template-file parameter can be used for values stored in a local .json file. The template-uri parameter can be used for values that are stored in a .json file at an HTTP endpoint.
