In Google Cloud, permissions are not assigned to users and groups directly. Instead, users have roles assigned to them. Roles are a collection of permissions. Permissions usually match API methods that describe which operations are allowed on a resource and have the following form: <service>.<resource>.<action>.
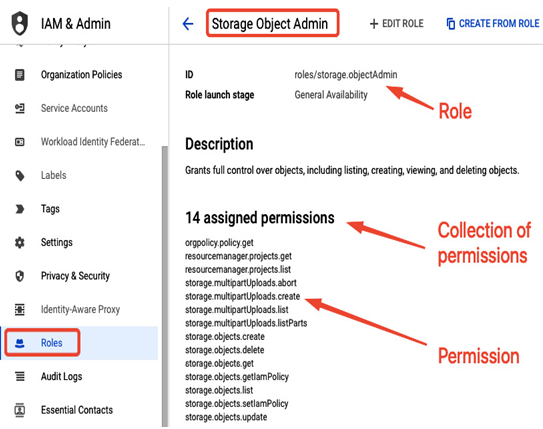
Figure 12.12 – Example of a role, which is a set of permissions
For example, as the preceding screenshot illustrates, the Storage Object Admin role is a collection of permissions such as storage.objects.create or storage.objects.delete.
There are three types of IAM roles:
- Basic roles, with very broad access that spans multiple Google services:
- Viewer, a role that allows viewing all resources.
- Editor, a role that allows viewing, creating, and deleting all resources.
- Owner, a role that allows viewing, creating, and deleting all resources and managing roles and permissions. Also, it allows setting up billing for a project.
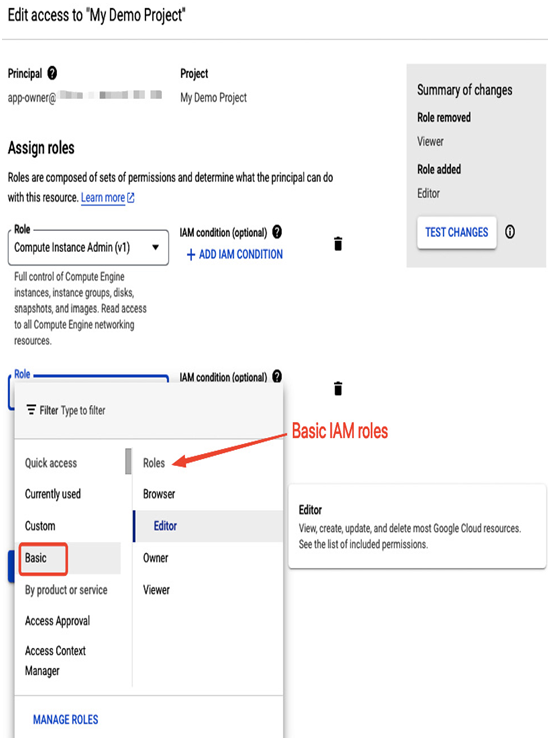
Figure 12.13 – Basic IAM roles in the Google Cloud console
- Predefined roles, that offer finer-grained access to resources. Those roles have permissions bundled together and usually have sufficient scope for working with a specific service. Administrators can choose from multiple options such as an admin of a service, a user of a service, or a viewer of a service. Multiple roles can be combined to provide necessary access. For example, the Compute Engine Instance Admin role has a set of permissions to manage Compute Engine VMs. Still, a user will need the compute.networks.create permission, which belongs to the Compute Network Admin role, to create a subnet for a VM:
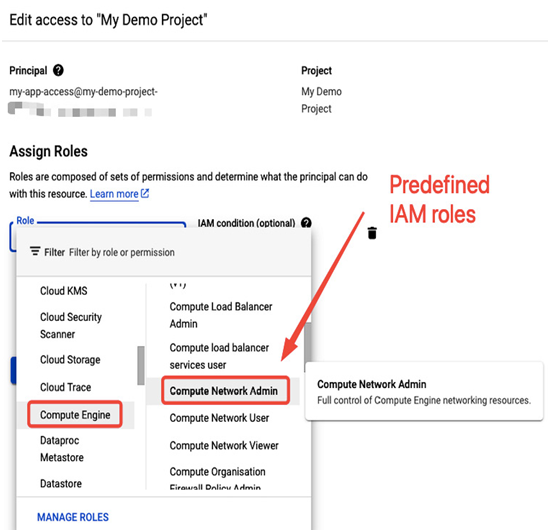
Figure 12.14 – Predefined IAM roles in the Google Cloud console
- Custom roles can be created from scratch by manually putting the required permissions together. Also, a custom role can be created out of an existing role or from existing roles. Custom roles require more administrative work to keep them up to date than predefined roles, as Google can introduce modifications to Google Cloud permissions from time to time.
To create a custom role, go to the Roles section in IAM & Admin and select CREATE ROLE. Next, you need to provide a descriptive name and set of permissions you want to be included in this role:
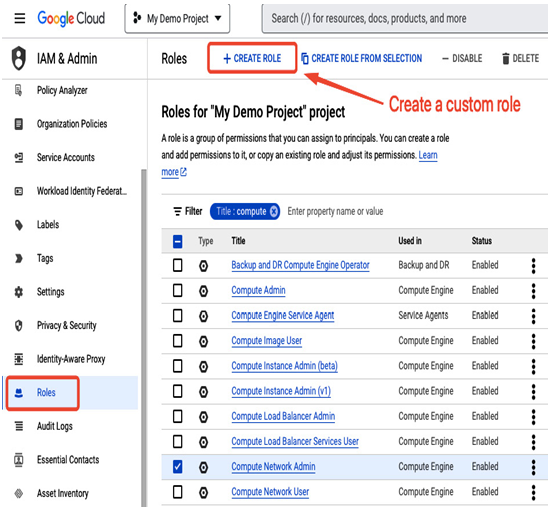
Figure 12.15 – Predefined IAM roles in the Google Cloud console
Building a role from scratch could be a trial-and-error process before completing the list of permissions. Creating a new role by cloning and modifying existing ones that best match the desired permissions would be easier.
Suppose you want to create a role with almost all Cloud Storage administrative permissions except the one for deleting objects. To achieve it, you should select the Storage Admin role in the Roles section and choose CREATE FROM ROLE option as presented in the following screenshot:
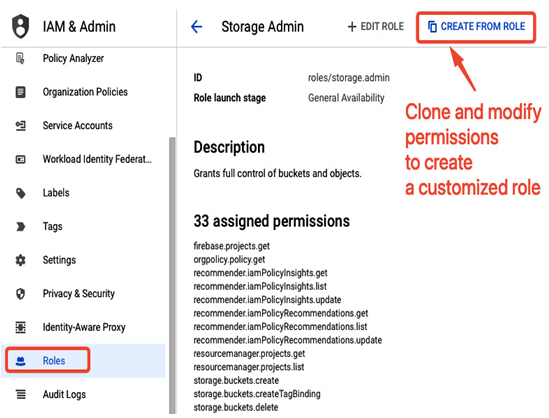
Figure 12.16 – Creating a new role from an existing one
Next, you need to select a name (Custom Storage Admin – Can’t Delete Objects in this case) and a description and remove permissions you don’t need for this role from the list. In our case, it will be storage.objects.delete:
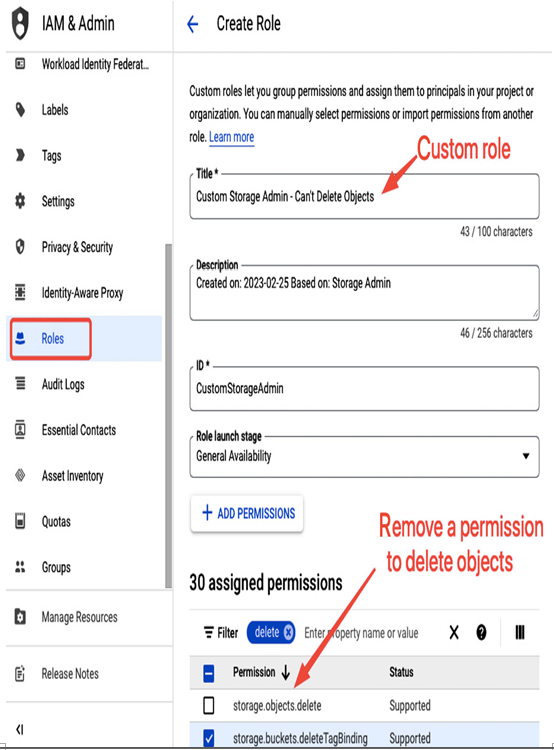
Figure 12.17 – Selecting permissions for a custom role
Once the role is created, it will be available for assignment, as presented in the following screenshot:
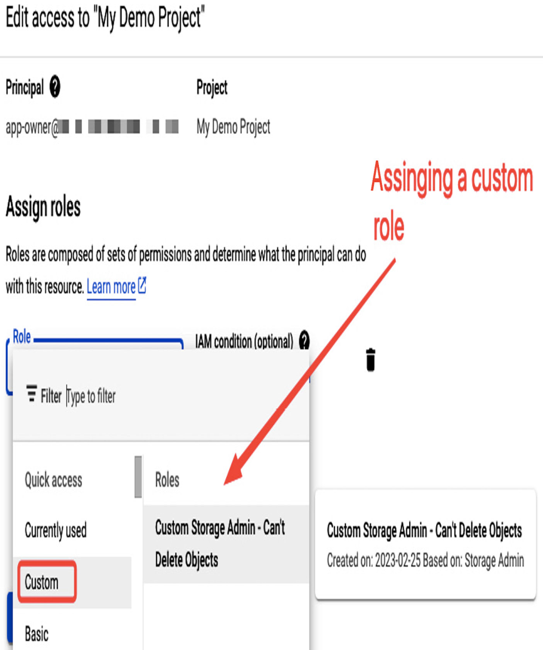
Figure 12.18 – Custom role assignment for a user
It is advised to test a role before assigning it to users. In this case, a role was assigned to the app-owner user. When trying to delete an object in a Google Cloud Storage bucket, this user was presented with an error that permission was missing for deleting an object, as can be seen in the following screenshot. Errors often describe what permission is missing for the task to be completed, simplifying troubleshooting:
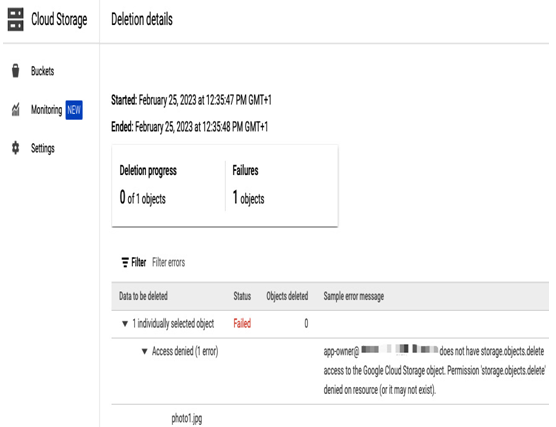
Figure 12.19 – A user needs the storage.object.delete permission to delete Google Cloud Stroage objects
Note that it is possible to copy custom roles between projects. The gcloud command can be used to copy a role created as in the preceding example (where we used CustomStorageAdmin as the source role ID, as shown in Figure 12.17) to another project:
gcloud iam roles copy –source=CustomStorageAdmin –source-project=<source-project> –destination=CustomStorageAdmin –dest-project=<destination-project>
