If you are moving resources between subscriptions, you must also be mindful of resource quotas. For example, if you are moving many virtual machines, you will need to make sure that the target subscription has enough vCPUs available, or the move operation will fail. Make sure you validate any quotas prior to moving a resource.
Finally, there are limitations in Azure Resource Manager that affect the number of resources you can move in a single operation. A single move operation in Resource Manager cannot move more than 800 resources. With this constraint, it is recommended that you break large operations into smaller batches. Note that even if you are moving fewer than 800 resources in a single move request, the operation may still fail by timing out.
If the resource you are moving has any dependent resources, the resources must all be located within the same resource group, and they must all be moved together. For example, a virtual machine is dependent on the network interface, disks, and possibly more depending on the deployment.
Once you have met the stated prerequisites to a move operation, you are ready to perform the move operation. You can move the resources with the Azure portal, Azure PowerShell, the Azure CLI, or the REST API. Note that Azure performs basic validation before performing the actual move operation, irrespective of the method being used. Additionally, you can validate the move operation through the REST API with the validateMoveResources method without actually performing the move operation. This API validates whether resources can be moved from one resource group to another resource group. If validation succeeds, an HTTP 204 will be returned, and if it fails, an HTTP 409 with an error message will be returned in the response. This method can be called with a POST request to
https://management.azure.com/subscriptions/%7bsubscriptionId%7d/resourceGroups/%7bsource ResourceGroupName%7d/validateMoveResources?api-version=2021-04-01
In a POST request, include a request body with “resources” and “targetResourceGroup” properties:
{
“resources”: [“<resource-id-1>”, “<resource-id-2>”],
“targetResourceGroup”: “/subscriptions/<subscription-id>/resourceGroups/<target-group>”
}
If the request is properly formatted, the operation will return output like the following:
Response Code: 202 cache-control: no-cache pragma: no-cache expires: -1
location: https://management.azure.com/subscriptions/<subscription-id>/ operationresults/<operation-id>?api-version=2018-02-01
retry-after: 15
…
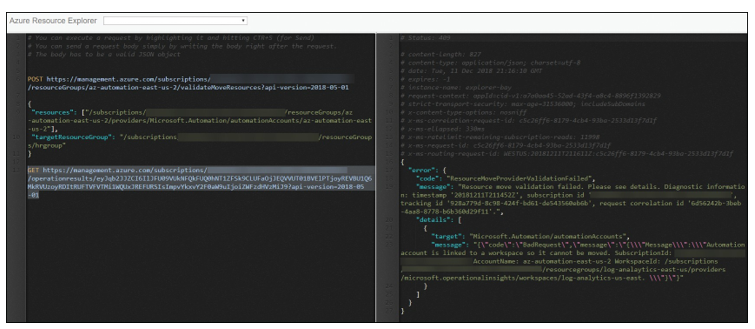
The HTTP 202 response code shows the request was accepted. The location URI can be used in an HTTP GET that you can use to check the status of the long-running operation for the final HTTP 204 or HTTP 409 status code. Figure 1-44 shows the output of an operation to validate a move request for an Azure Automation account associated with a Log Analytics workspace. As expected, the validation operation returned an HTTP 409 because this move request cannot be executed.

FIGURE 1-44 ValidateMoveResources API response
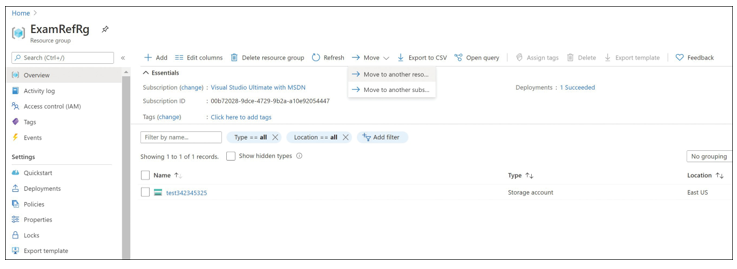
To use the Azure portal, browse to the resource group containing the resources, click Move, and choose Move To Another Resource Group or Move To Another Subscription, as shown in Figure 1-45.

FIGURE 1-45 Move menu in the Azure portal
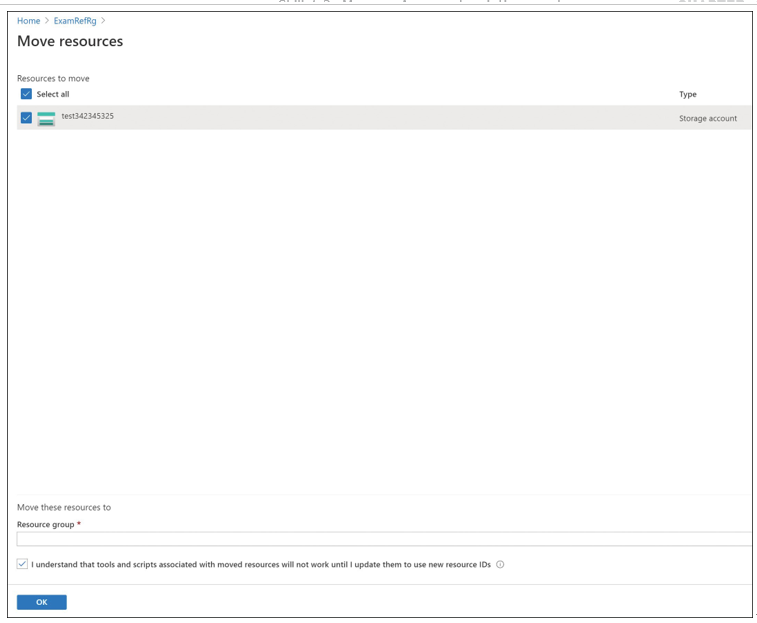
You can now select the resources to move and select the destination resource group. Note that you must acknowledge that you might need to update existing tools or scripts to account for the changes in resource IDs (see Figure 1-46).

