Command line
The creation of a minimalistic deployment pool (bare minimum without any extra settings) can be achieved by executing the following command:
gcloud container node-pools create POOL_NAME –cluster CLUSTER_NAME –region=REGION_NAME
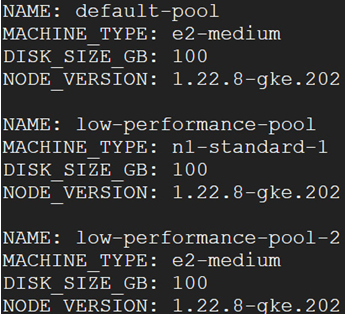
Execution of this command results in default settings configured for the node pool—three nodes with e2-medium as the machine type:

Figure 6.21 – Default and newly created node pool with default settings
In the next section, we will modify node pools.
After node pool creation, available operations that can be performed on the node pool are limited.
We can do the following:
- Change the number of nodes
- Enable the cluster autoscaler
- Change zones
- Choose a different image type
- Enable/disable surge upgrade
- Modify Kubernetes labels
- Modify node taints
- Modify network tags
As usual, we can modify the node pool using Cloud console, the CLI, or Cloud SDK.
Cloud console
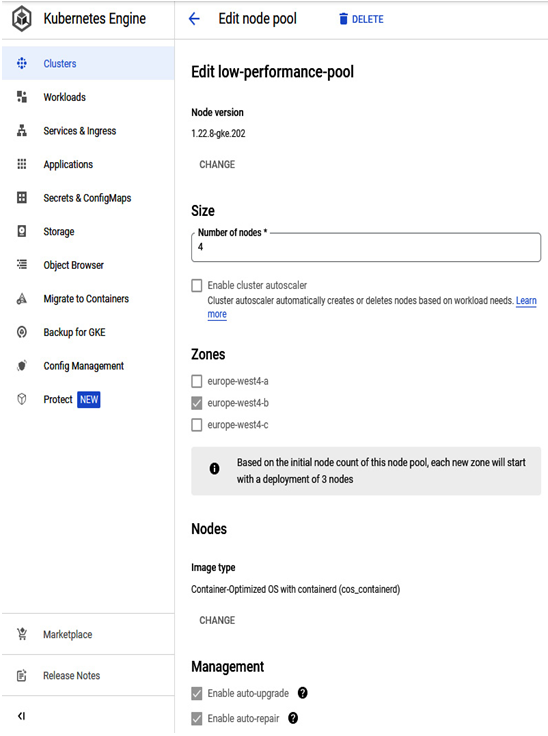
Click on the desired cluster, navigate to Nodes, and choose and click the node pool you wish to edit.
Once you click Edit, make the desired changes and click Save:

Figure 6.22 – Changes in node pool in Cloud console
Once the changes are done, the node pool will be updated with the desired settings.
Command line
We can also edit node pool details by utilizing the CLI. For example, if we want to resize the node pool, we can use the following command:
gcloud container clusters resize CLUSTER_NAME –node-pool NODE_POOL_NAME –num-nodes NUM_NODES
In the gcloud container clusters namespace, other commands can be performed on clusters, as follows:
- create
- create-auto
- delete
- describe
- get-credentials
- list
- resize
- update
- upgrade
We encourage you to try other namespaces and play with your Kubernetes clusters while learning.
One of the final tasks that can be performed on a node pool is its deletion.
Cloud console
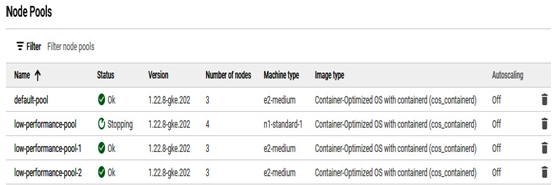
In Cloud console, we need to click on the desired GKE cluster, and then in the Node Pools section, we need to click on the “trash” icon to delete the desired node pool:

Figure 6.23 – Deleting a node pool in Cloud console
After a few moments, node pool deletion will be finished. We must remember that any node pool operation or changes will block other node pool changes. Only after the initial node pool activity change will we be able to conduct other changes.
Command line
We will finish our node pool activities with command-line deletion. To delete the node pool using the command line, we need to execute the following command:
gcloud container node-pools delete NODE_POOL_NAME –cluster CLUSTER_NAME –zone=ZONE_NAME
After a moment, node pool deletion is successful.
After familiarizing ourselves with operations on node pools, we can proceed with learning about Pods, operations we can perform, and how to create, delete, and update Pods.
Before we start managing Pods, we must learn what they are and how to deploy them.
Essentially, Pods are the smallest deployable units of computing that can be created and managed in Kubernetes. A Pod is a group of one or more containers, such as Docker containers. Pods share network and storage resources and represent an instance of a running process in the Kubernetes cluster.
Once clusters and node pools are ready, we will mainly work with Pods, and in the next sections, we will learn in detail about their lifecycle and possible operations.
