“Postman is an API platform for building and using APIs. Postman simplifies each step of the API life cycle and streamlines collaboration so that you can create better APIs – faster”.
This quote is from https://www.postman.com/product/what-is-postman/.
Postman can be used on any modern operating system – Windows, Linux, or macOS. To download it, go to https://www.postman.com/downloads/postman-agent/. If you do not wish to install Postman, you can use the web-based portal to interact with Google Cloud services using API calls:
- Open Postman and click the + button to create a new API call.
- We will start with a straightforward GET call to list instances in a particular Google Cloud zone: GET https://compute.googleapis.com/compute/v1/projects/{project}/zones/{zone}/instances. We will change the project and zone to the values that reflect our environment.
- In Postman, we must enter the previous URL with the correct project name and zone:
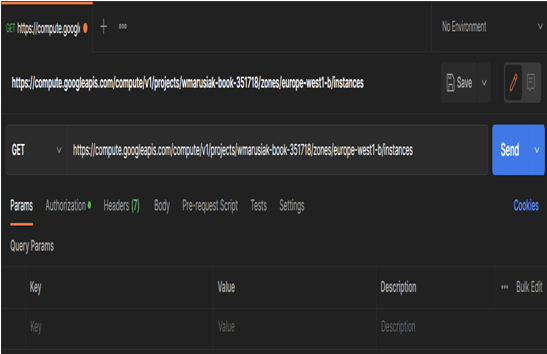
Figure 10.19 – GET API call to query GCE instances in the europe-west4-a zone
- Let’s test whether we can retrieve any information by clicking Send.
- As we can see in the Body section, there was an error with a status code of 401 Unauthorized.
- We authorized and previously created OAuth credentials in Google Cloud to authorize.
In the Authorization tab of Postman, choose OAuth 2.0:
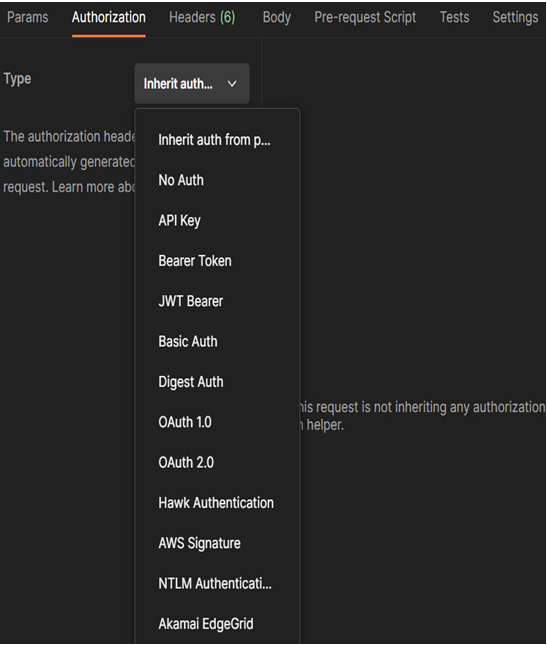
Figure 10.20 – The Authorization section of the API call
- In the Configure New Token section, we need to configure the following information:
- Type: OAuth 2.0
- Add authorization data to request headers
- Token Name: Enter your desired name
- Grant Type: Authorization code
- Callback URL: We will use previously configured URLs in the Credentials section of API & Services – that is, https://www.getpostman.com/oauth2/callback and https://oauth.pstmn.io/v1/callback
- Auth URL: https://accounts.google.com/o/oauth2/auth
- Access Token URL: https://accounts.google.com/o/oauth2/token
- Client ID: Our previously created OAuth credential Client ID
- Client Secret: Our previously created OAuth credential client secret
- Scope: https://www.googleapis.com/auth/cloud-platform
8. Click the Get New Access Token button to retrieve a new token:
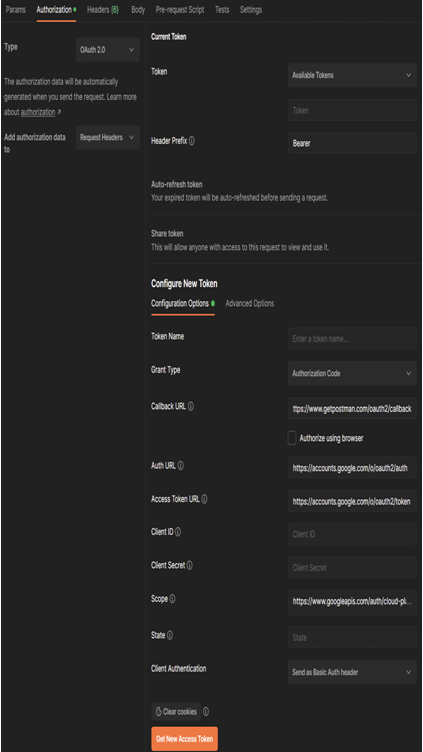
Figure 10.21 – New token filled with necessary information
- We need to authenticate using our email and password:
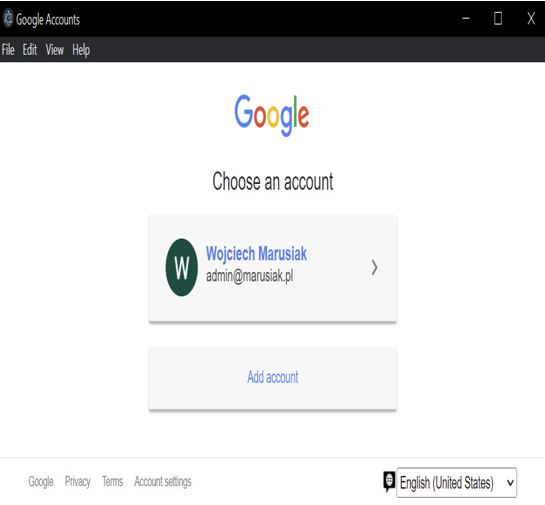
Figure 10.22 – Authentication to Google Cloud
- We need to accept Postman permissions. If you are okay with Postman managing your Google Cloud data, proceed by clicking Allow.
- The token will be successfully created and can be used with Google Cloud:
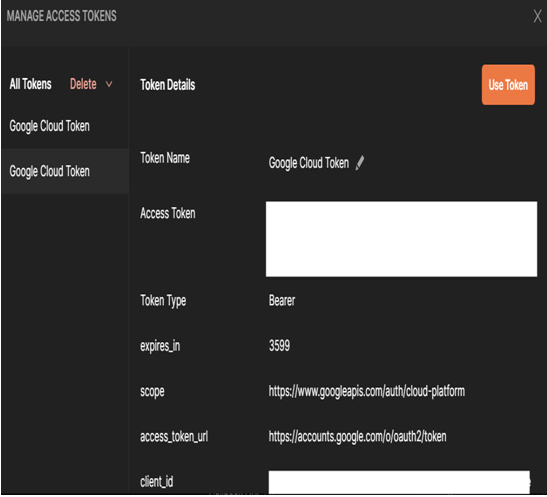
Figure 10.23 – Successful token creation
- To finalize the token creation process, click the Use Token button.
- Finally, after completing the authorization process, we can execute the GET call. Click the SEND button. In the response’s Body section, we will see the response’s output and Google compute instance details:
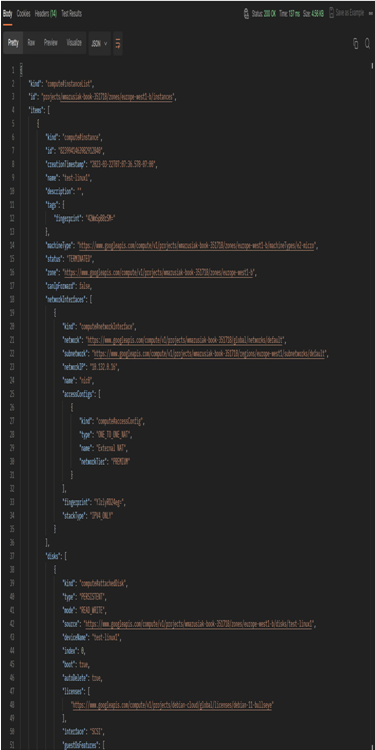
Figure 10.24 – Successful response and the compute instance details
Now that we’ve learned how to use Google Cloud APIs and retrieve information about compute instances, we will proceed with more hands-on examples.
