The free trial program ends when you spend your $300 in credits or 90 days have passed since you signed up.
You can check your Google Cloud expenditure and remaining days in Billing Overview:
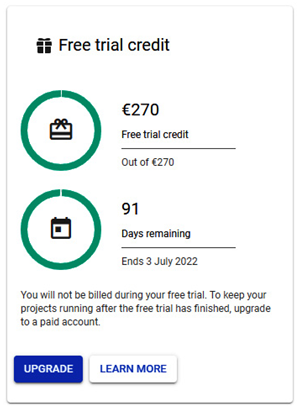
Figure 3.7 – Free trial credit status in the Billing Overview section
Please note that the initial $300 is converted into the currency used where you reside.
Upgrading to a paid Cloud Billing account
As you progress with learning about Google Cloud, your free trial might end, or you might have already used all $300 in credit. There might be a case where even if your free trial is not yet finished, you would like to create a Windows-based VM or increase your quotas.
To do so, you need to upgrade to a paid Cloud Billing account. You remove some initial restrictions and ensure that your resources won’t be deleted by upgrading.
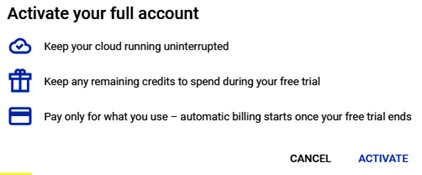
Figure 3.8 – Activation of a complete account
As you can see in the preceding figure, activation is done just by clicking the ACTIVATE button.
Once our account is fully activated, we can start using all Google Cloud services. In the next section, we will describe the Google Cloud Free Tier offering.
Free Tier is an offer from Google Cloud where users can use services for free. One difference between a free trial and Free Tier is that Free Tier is available to all Google Cloud users. Free Tier is available to users monthly, and its limits are calculated per billing account. In the next section, we will understand the Free Tier usage limits and which products can be used in the program.
Free Tier usage limits
Google Cloud offers more than 28 products included in the Free Tier program. The range of products is broad: from Google App Engine, BigQuery, Cloud Functions, GCE, or GKE up to reCAPTCHA Enterprise and Pub/Sub.
Please visit the following page to review details about Free Tier usage limits per available product: https://cloud.google.com/free/docs/gcp-free-tier#free-tier.
If the usage of the product exceeds the Free Tier limits, the user is billed for the product at standard rates.
Billing in Google Cloud is quite an important topic. Without a billing account with an associated payment method, you can’t run any cloud resources. This is critical if you have production workloads and don’t want interruptions. Payment method issues might cause account suspension, and you certainly want to avoid that.
In the next section, we will guide you through the process of creating a billing account.
Creating a billing account
If a Google Cloud organization manages your account and you are a member, you must have Billing Account Creator permissions:
- From Google Cloud Console, click on Billing.
- Select the Google Cloud organization if you are part of one; otherwise, proceed with account creation:
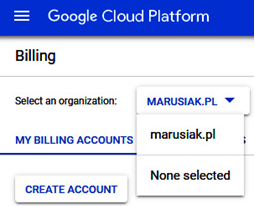
Figure 3.9 – Selection of an organization when creating a billing account
3. Click CREATE ACCOUNT.
4. Enter a name in Name, choose an option for Country, and click CONTINUE to proceed.
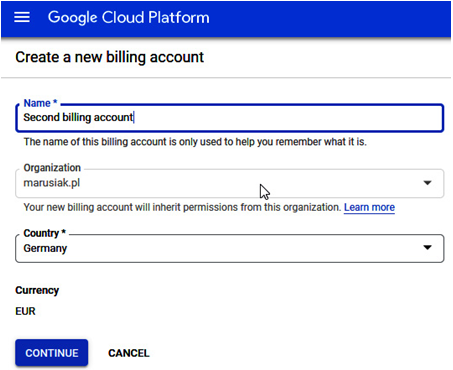
Figure 3.10 – We need to provide the billing account name and choose a country with the associated currency
5. We are at the last stage of creating a new billing account. We can select an existing payment profile or create a new one. If we already have a payment profile associated with the payment method, we need to click SUBMIT AND ENABLE BILLING.
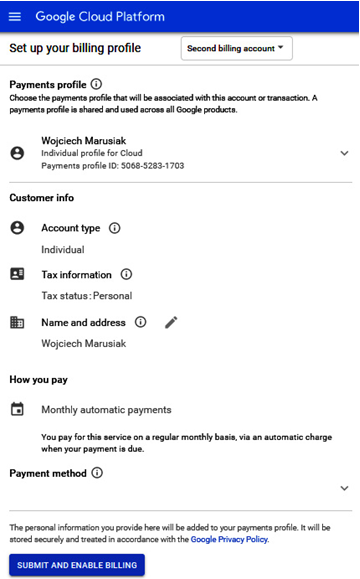
Figure 3.11 – Final step to complete the new billing profile creation
6. The new billing profile is ready to use:
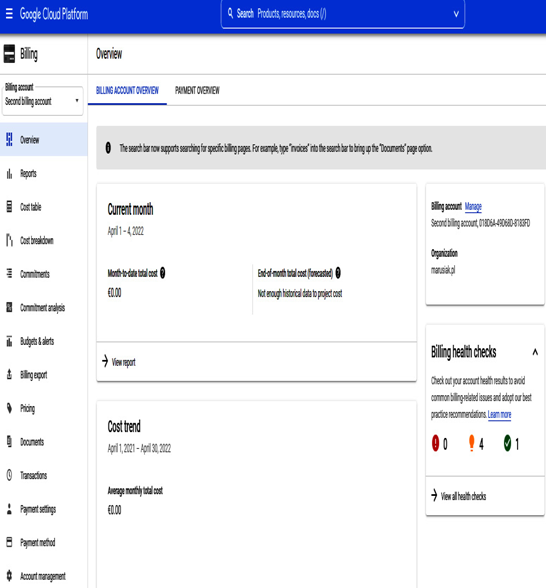
Figure 3.12 – Newly created billing profile is active
Once the billing profile is created, we can link it to a project.
