Sharing within Salesforce communities
Before closing this chapter, a few words should be said on how sharing is handled in communities. You should already be aware of what Salesforce communities are, but let’s provide a brief summary anyway.
Salesforce communities are a way to allow external people to interact and collaborate with your business processes. This includes customers, partners, or even employees. They are an effective way to share Salesforce data with external users and allow internal users to interact with them, reducing the service cost.
Communities are created using point and click features with tools such as the Community Builder with built-in Lightning components ready for admins to use. You can even create your own customizations using Visualforce pages or Lightning components (with your developer’s help):
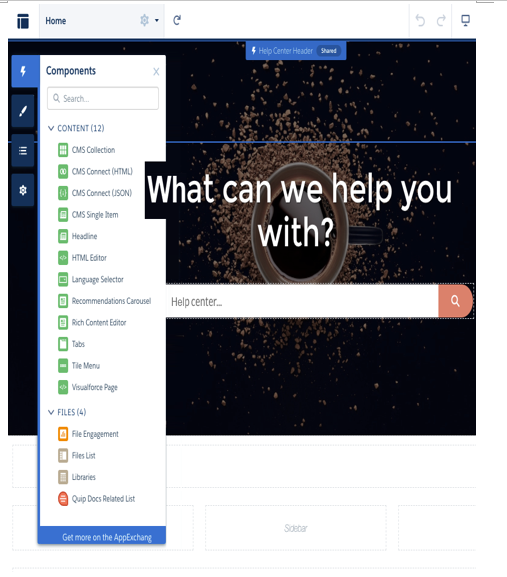
Community builder
An organization can have multiple communities for different uses. Let’s look at some examples:
- A customer community where your customers can activate self-service in order to reduce the amount of effort needed for the back office to support your products
- A partner community dedicated to your external sales partners where they can create opportunities and help your internal sales team
- An employee community for dedicated internal activities such as collaboration
Communities are the evolution of the old customer and partner portals feature.
When you create a community, you have to choose a preset template from the available list on the community creator wizard. These templates allow you to expose a certain subset of features of your CRM (Sales- or Service-oriented).
Talking about data sharing, as we saw when we talked about OWD and external sharing, a community’s users have a dedicated sharing model. It can be role-based or sharing-set-based, depending on the user licenses in use.
For Partner Community, Customer Community Plus, and Lightning External Apps Plus user licenses, you can define an internal role hierarchy based on the account that each external user is associated with.
You can define how users are hierarchically related within a given account; for example, when you enable an account to be a partner account (at the time of writing, you need to switch to Classic to use the Enable as Partner button on the account record).
Go to Setup | Feature Settings | Communities | Communities Settings and set the number of partner roles (Community Role and User Settings). Let’s say we want three roles. When enabling a new partner user, the user creation form displays a role picklist where you can define the role for that given user within the account’s hierarchy:
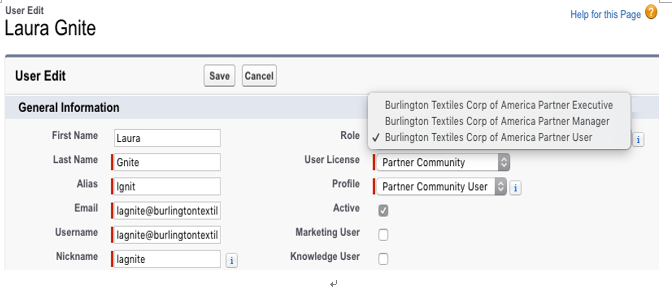
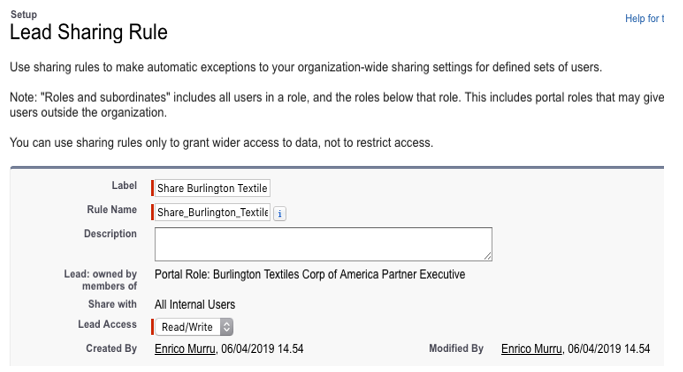
These roles appear in the portal roles or portal roles and subordinates when you’ve defining sharing. This way, records owned by partner users can be shared using the usual sharing model:
For performance reasons, keep the number of partner/customer roles to one and use partner super user access to grant specific users within the account’s hierarchy access to records owned by other community users, including the child of the same account.
To enable this feature, go to the Communities Settings page:
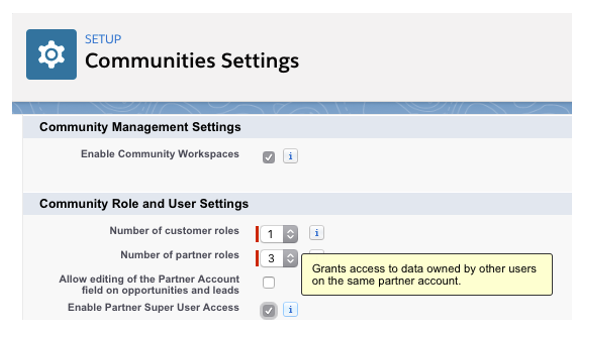
Partner and customer roles in communities
Super user access is enabled for opportunities, cases, leads, and custom objects owned by community users.
To assign this kind of permission, use the Manage External User dropdown in the contact layout in classic mode:
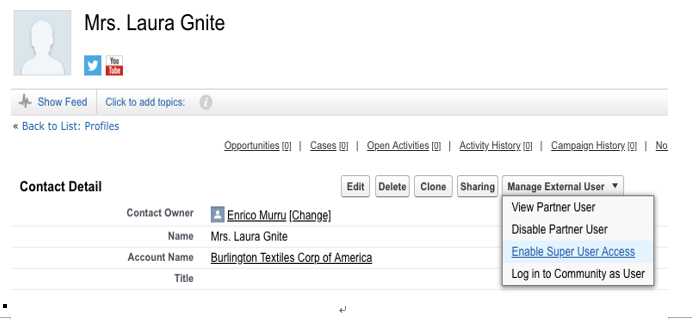
Super user access enabled on the contact page
To assign superuser access for customer users, create a permission set (or use a previously created one) with the portal super user permission and assign it to the community users that you want to be superusers.
