Let’s now focus on start and stop activities, which are a great introduction to working with the Cloud console and the gcloud command line. You might ask yourself, why do we need to stop an instance? If resources aren’t consumed, you don’t need to pay for them. Running instances that you don’t need might increase your bill significantly. This might not be the case if you have only two or three instances, but it might make a difference if you have hundreds or thousands of instances. Enterprises can stop development and acceptance instances that are needed only during working hours to save thousands of dollars.
Console
Once logged in to the Cloud console, in the Compute Engine section, select the desired GCE instance and click the STOP button:
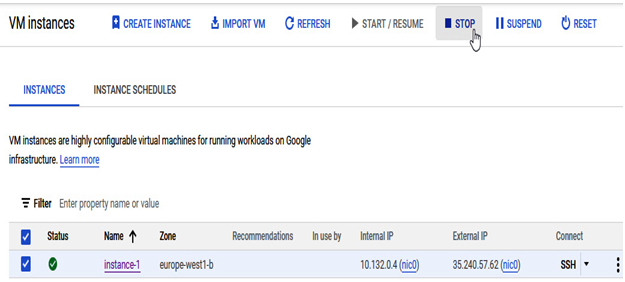
Figure 4.13 – Stopping the GCE instance using the Cloud console
Similar to stopping the instance, we can start it by clicking on the START / RESUME button when it is selected:
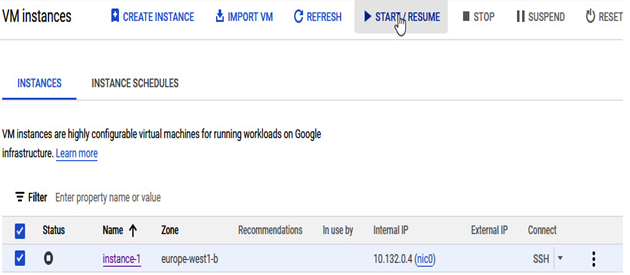
Figure 4.14 – Starting the GCE instance using the Cloud console
Command line
An instance can also be started by using the command line:
gcloud compute instances start INSTANCE-NAME –zone=ZONE-NAME
Here’s an example – gcloud compute instances start instance-1 –zone=europe-west1-b.
To stop the instance, we need to execute the following command-line commandlet:
gcloud compute instances stop INSTANCE-NAME –zone=ZONE-NAME
Here’s an example – gcloud compute instances stop instance-1 –zone=europe-west1-b.
Adding a public SSH key to a VM
GCE allows us to add SSH keys to Linux VMs during VM creation or to an existing VM. SSH keys are a popular way to administer Linux servers because they are more secure than passwords. Passwords can be easily guessed or stolen, but SSH keys are much more difficult to compromise. This makes SSH keys a more secure way to access Linux servers.
In addition, if the organization policy allows or configures it, it is possible to add a public SSH to project metadata to access all VMs in a project. This setting can be overridden during VM creation.
To learn more about creating SSH keys, visit the following link: https://cloud.google.com/compute/docs/connect/create-ssh-keys#linux-and-macos.
Console
To add an SSH key to a VM when it is created, we need to add it in the NETWORKING, DISKS, SECURITY, MANAGEMENT, SOLE-TENANCY section.

Figure 4.15 – Advanced options available when creating the VM
Once we open this menu and navigate to the Security option, we can click the + ADD ITEM button and add the public SSH key:
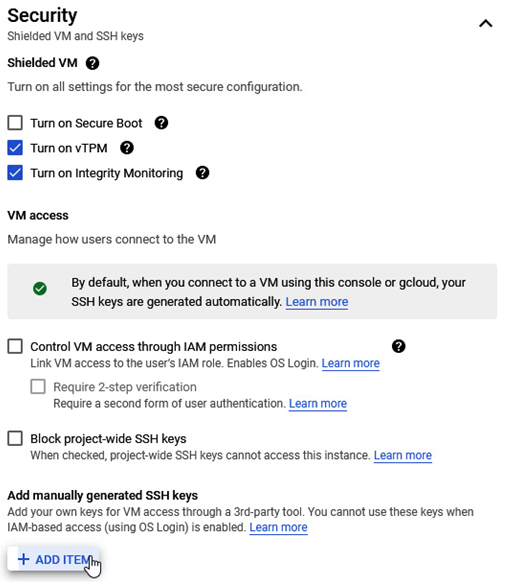
Figure 4.16 – The Security part of the advanced VM configuration
Once added, we can continue configuring VMs and creating them:

Figure 4.17 – The SSH key added to the VM configuration during the creation process
We could also add it later if the VM were created without SSH keys during the creation process.
Click on the instance name and use the edit button to add the SSH key:
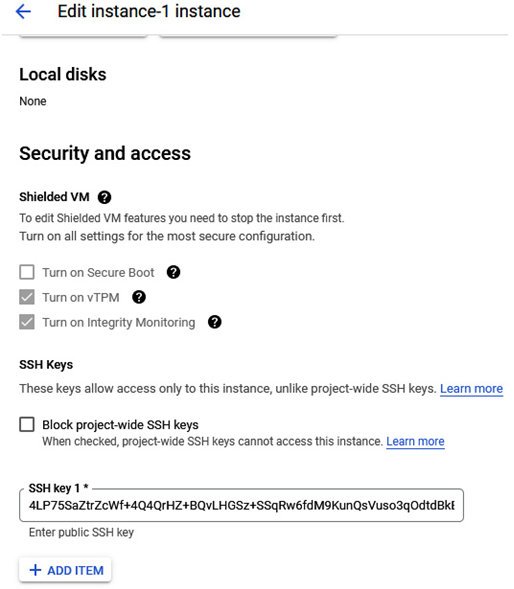
Figure 4.18 – The SSH key added to the running VM configuration
Once the SSH key has been added, confirm the change by clicking the Save button.
The SSH key will be visible in the DETAILS section of the VM:
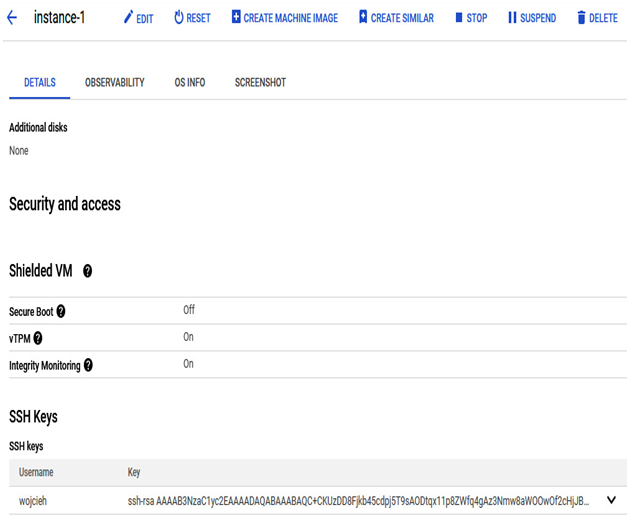
Figure 4.19 – The SSH key added to running VM configuration visible in the instance details page
Now, let’s add the SSH keys using the command-line interface.
