Versioning
An Azure storage account provides two primary options for tracking blob objects: versioning and change feed. Versioning can be used to automatically retain previous versions of a blob object. You can choose whether to keep all versions of a blob or, to help with managing stor- age costs, delete versions after a specific number of days. The retention period for versions can be defined between 1 and 365 days, with the default set to 7 days.
Blob change feeds keep a log of all create, modify, and delete operations to the blob objects in the storage account. You can configure the account to keep all logs, or to delete logs after a certain number of days. This can be configured from 1 day to 146,000 days, with a default of 7 days.
To configure both versioning and blob change feed, navigate to the Data Protection blade of a storage account. Figure 2-47 displays this blade with the default retention periods configured.
Snapshots
Snapshots are point-in-time restore options for containers and file shares. To use snapshots with blob containers, the blob versioning and blob change feed options must be enabled. Using a snapshot with a blob container will revert all objects in the container to the version, or point in time, that you select. Snapshots for blob storage are configured on the Data Protection blade of the storage account using the Enable Point-In-Time Restore option, also shown in Figure 2-47.
Snapshots can also be configured for Azure Files at the file share level. Unlike blobs, which are kept with the storage account, using snapshots for file shares requires an Azure Recovery Services vault and backup policy to retain the previous file version data. As with blobs, using snapshots with file shares also requires that soft delete be enabled for the file shares in the account.
To configure snapshots on a file share, navigate to File Shares from the storage account, and then select a configured file share. From the file share, select Snapshots. You will be prompted to either configure or select an Azure Recovery Services vault and associated backup policy and frequency for the files, as shown in Figure 2-48.
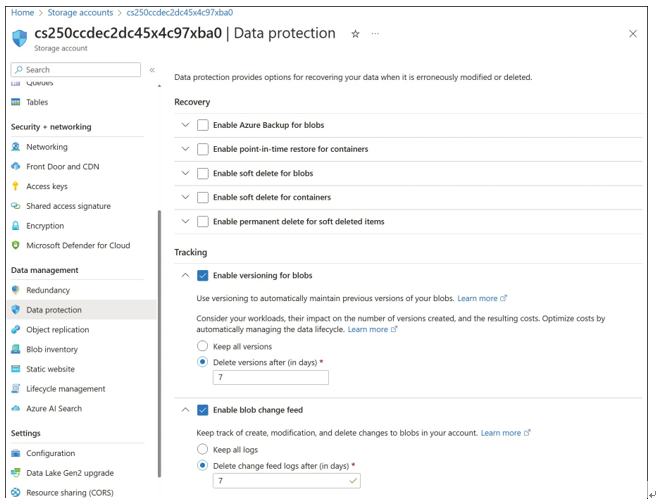
FIGURE 2-47 Data protection versioning options
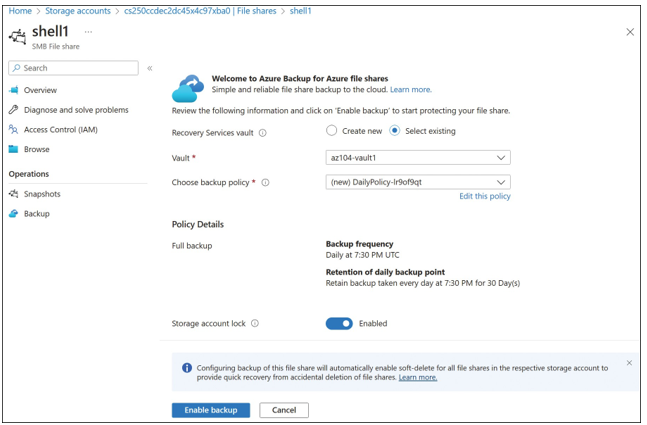
FIGURE 2-48 Snapshots – Azure file shares
Configure blob lifecycle management
Azure Storage has a lifecycle management capability, which can be used to transition data to lower-access tiers automatically based on pre configured rules. You can also delete the data at the end of its lifecycle. These rules can be executed against the storage account once per day. Specific blobs and containers can be targeted using filter sets.
To configure the lifecycle management rules, open the storage account, browse to Lifecycle Management under Data Management, and click Add A Rule (see Figure 2-49). You can define up to 100 rules.
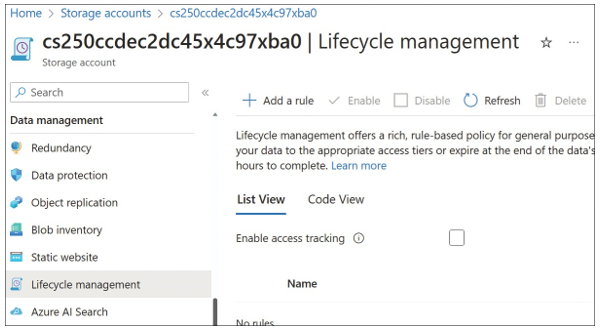
FIGURE 2-49 Add A Rule option on the Lifecycle Management blade
You can limit the rule scope with a filter set by selecting Limit Blobs With Filters, as shown in Figure 2-50. You can also select the Blob Type and Blob Subtype that should be applicable to this rule. You can also select Append Blobs, Snapshots, and Versions. Then click Next.
You can configure rules on the Base Blobs page to define the blob lifecycle policy.
You can create multiple if-then blocks to define the several conditions. For example, you can move blob data to cool storage if it is not modified for the specified number of days. Similarly, you can also create rules to move blobs to cold or archive storage, or delete them if not modified for the defined number of days. In Figure 2-51, the condition has been created for 30 days, and all four actions are shown in the drop-down menu. Click Next to configure the filter set.
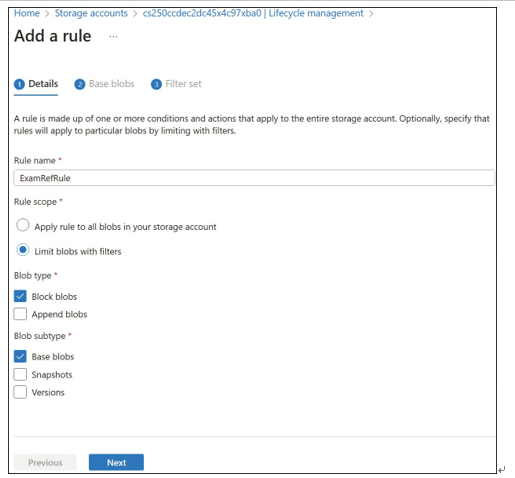
FIGURE 2-50 Details section for a new rule under Lifecycle Management
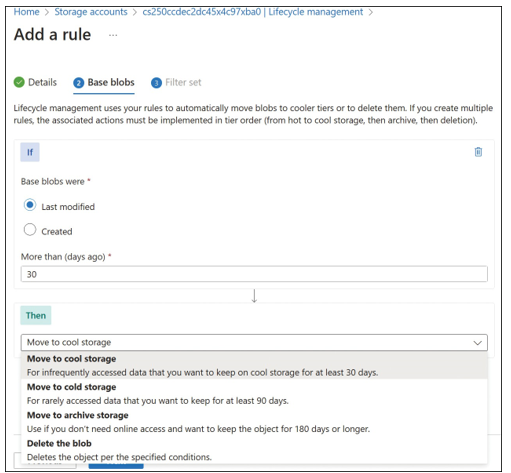
FIGURE 2-51 Base Blobs tab for a rule on the Lifecycle Management blade
On the Filter Set tab, you can specify the prefix to find items within the container. You need to specify the container name/prefix. For example, you could choose data/cost where data is the name of the container, and cost is the prefix, as shown in Figure 2-52. You can also use the Blob Index Match if you have indexed the items with keys and values in your containers. You can specify up to 10 prefixes per rule.
Now click Add to create the rule.
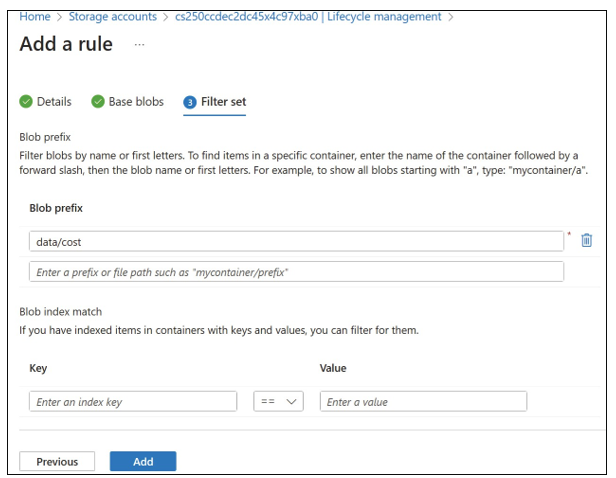
FIGURE 2-52 Filter set for a rule on the Lifecycle Management blade
Once created, the consolidated view of code can be viewed on the Code View tab, as shown in Figure 2-53.

You can delete a rule anytime if it isn’t required anymore using the Lifecycle Management blade.
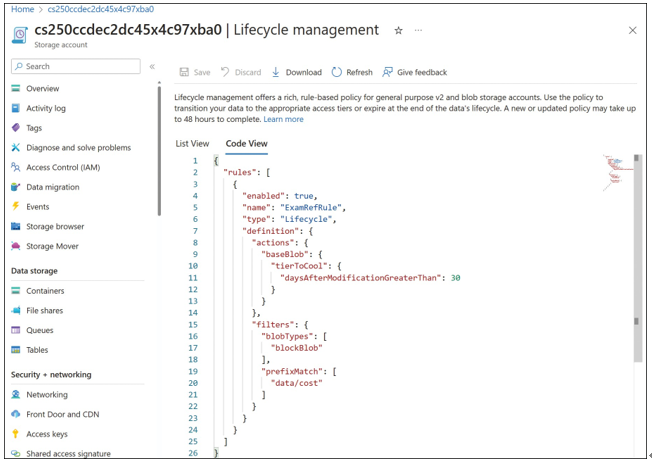
FIGURE 2-53 Code view for the lifecycle management configuration
